Author Archives: Ashley Smith

10 Ways to Make Your Home Look Expensive on a Budget 

Want your home to look classy and expensive but don’t want to break the bank in the process? We’ve got you covered! Today we’re sharing 10 cheap and easy ways to make your home look expensive on a budget.

#1: Start with a Blank Canvas

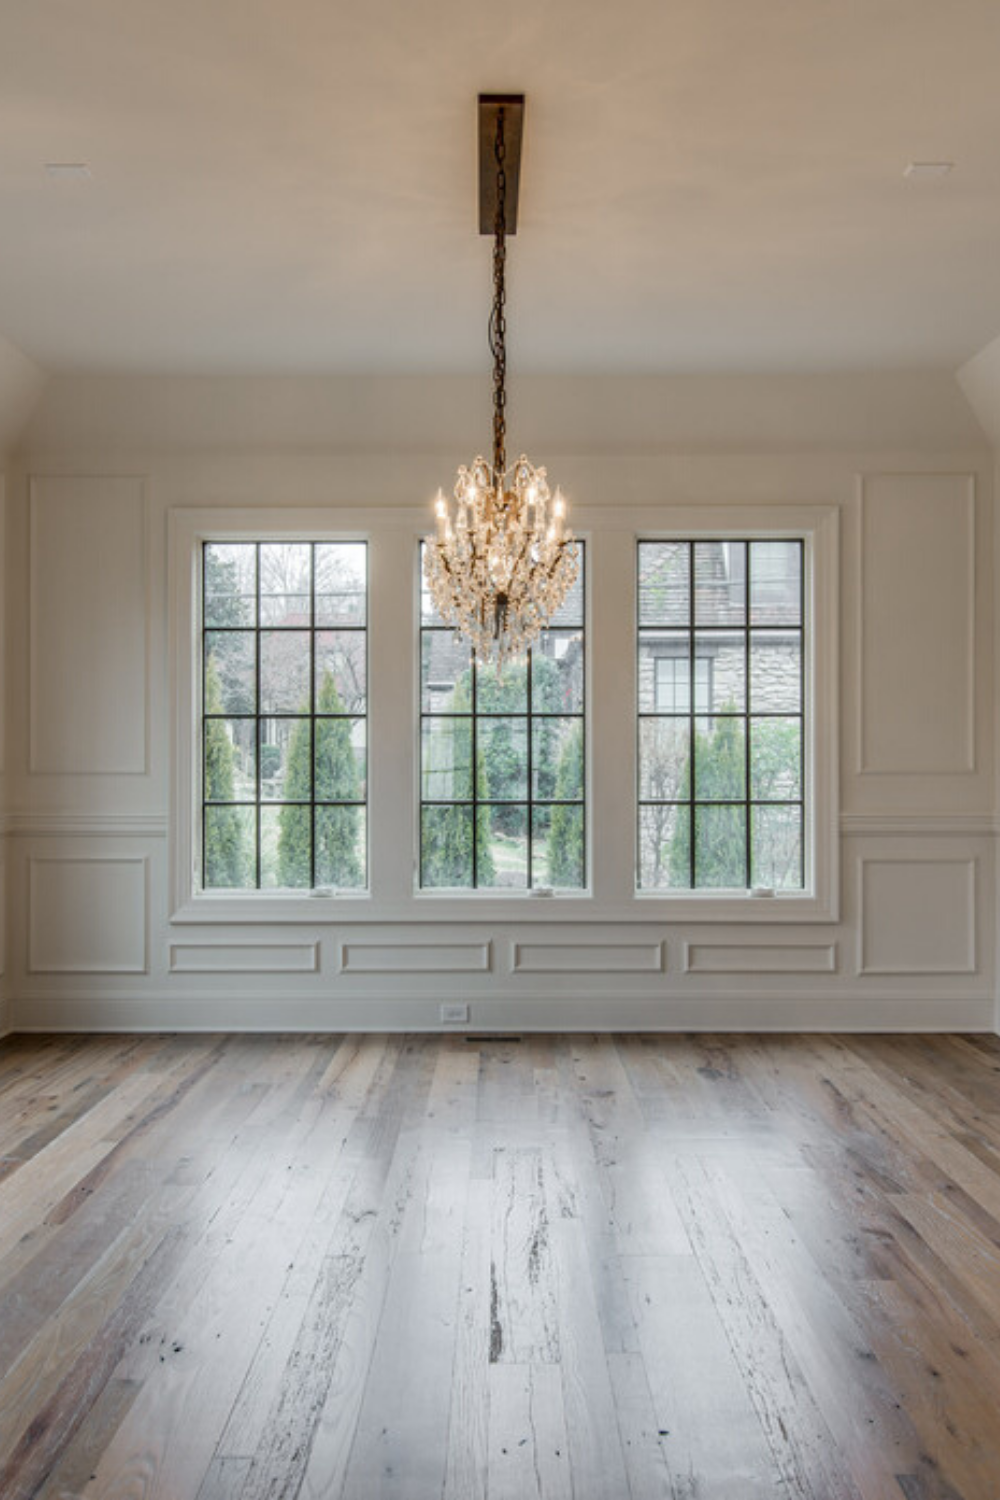
An easy way to transform and update any space is to simply start over. Clear out the room and start from scratch. Once it’s empty, observe the room’s best features—does it have hardwood floors, a fireplace, built-in bookshelves, a huge window, or thick wooden trim?

When you bring the furniture and decor back in (maybe you’ll even leave some of it out for good), rearrange the items to highlight the room’s unique features.

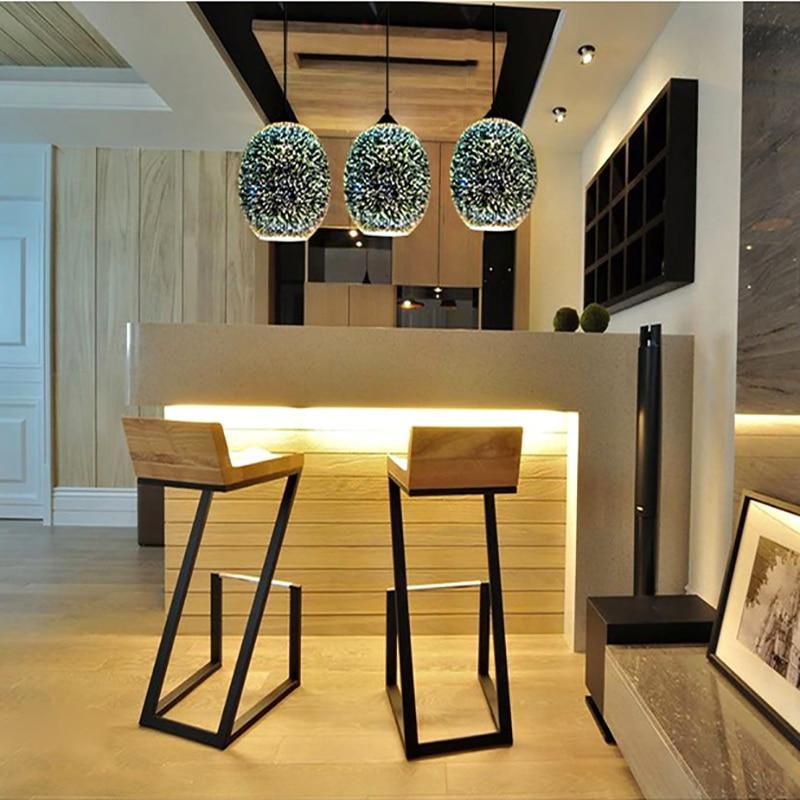
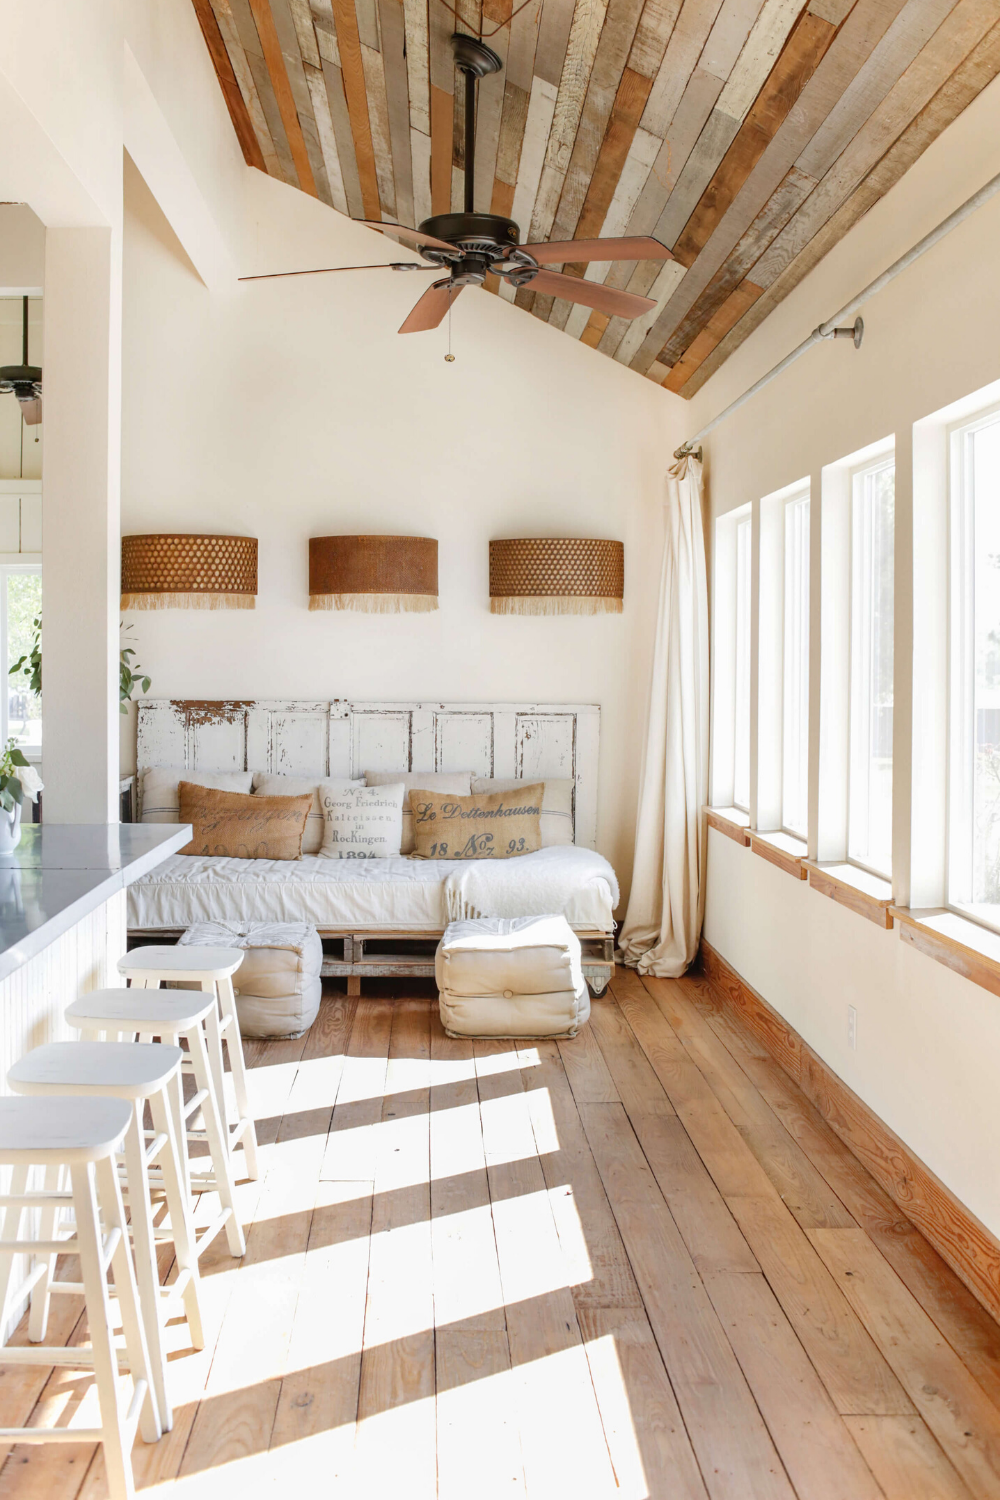
#2: Fake High Ceilings & Huge Windows

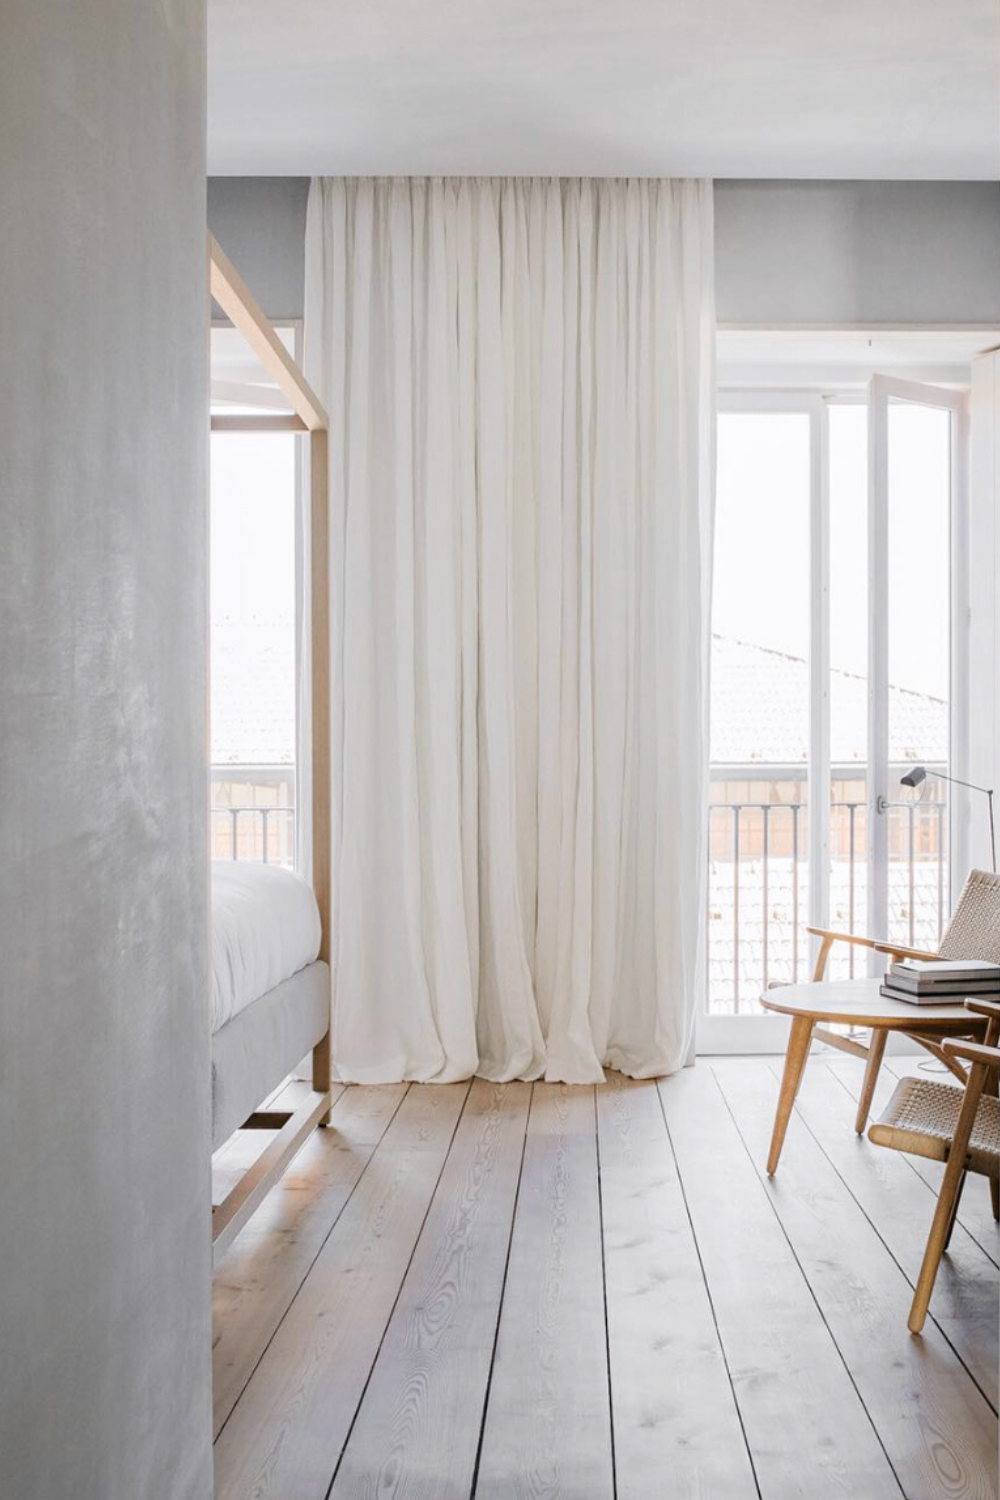
Expensive houses always seem to have those high ceilings and huge windows, but don’t worry! Even if your house doesn’t feature 12-foot ceilings and floor to roof windows, you can fake the look.

Simply purchase extra long curtains (make sure they’ll touch both the floor and the ceiling), and hang your curtain rod up near the ceiling for an inexpensive illusion of height and elegance.

DIY Budget-Friendly Tip: Don’t want to purchase a new set of curtain panels? Simply sew on a complimentary section of fabric to the top or bottom of your panels to add the extra length. Or if you don’t sew, take the panels and extra fabric to a local seamstress.

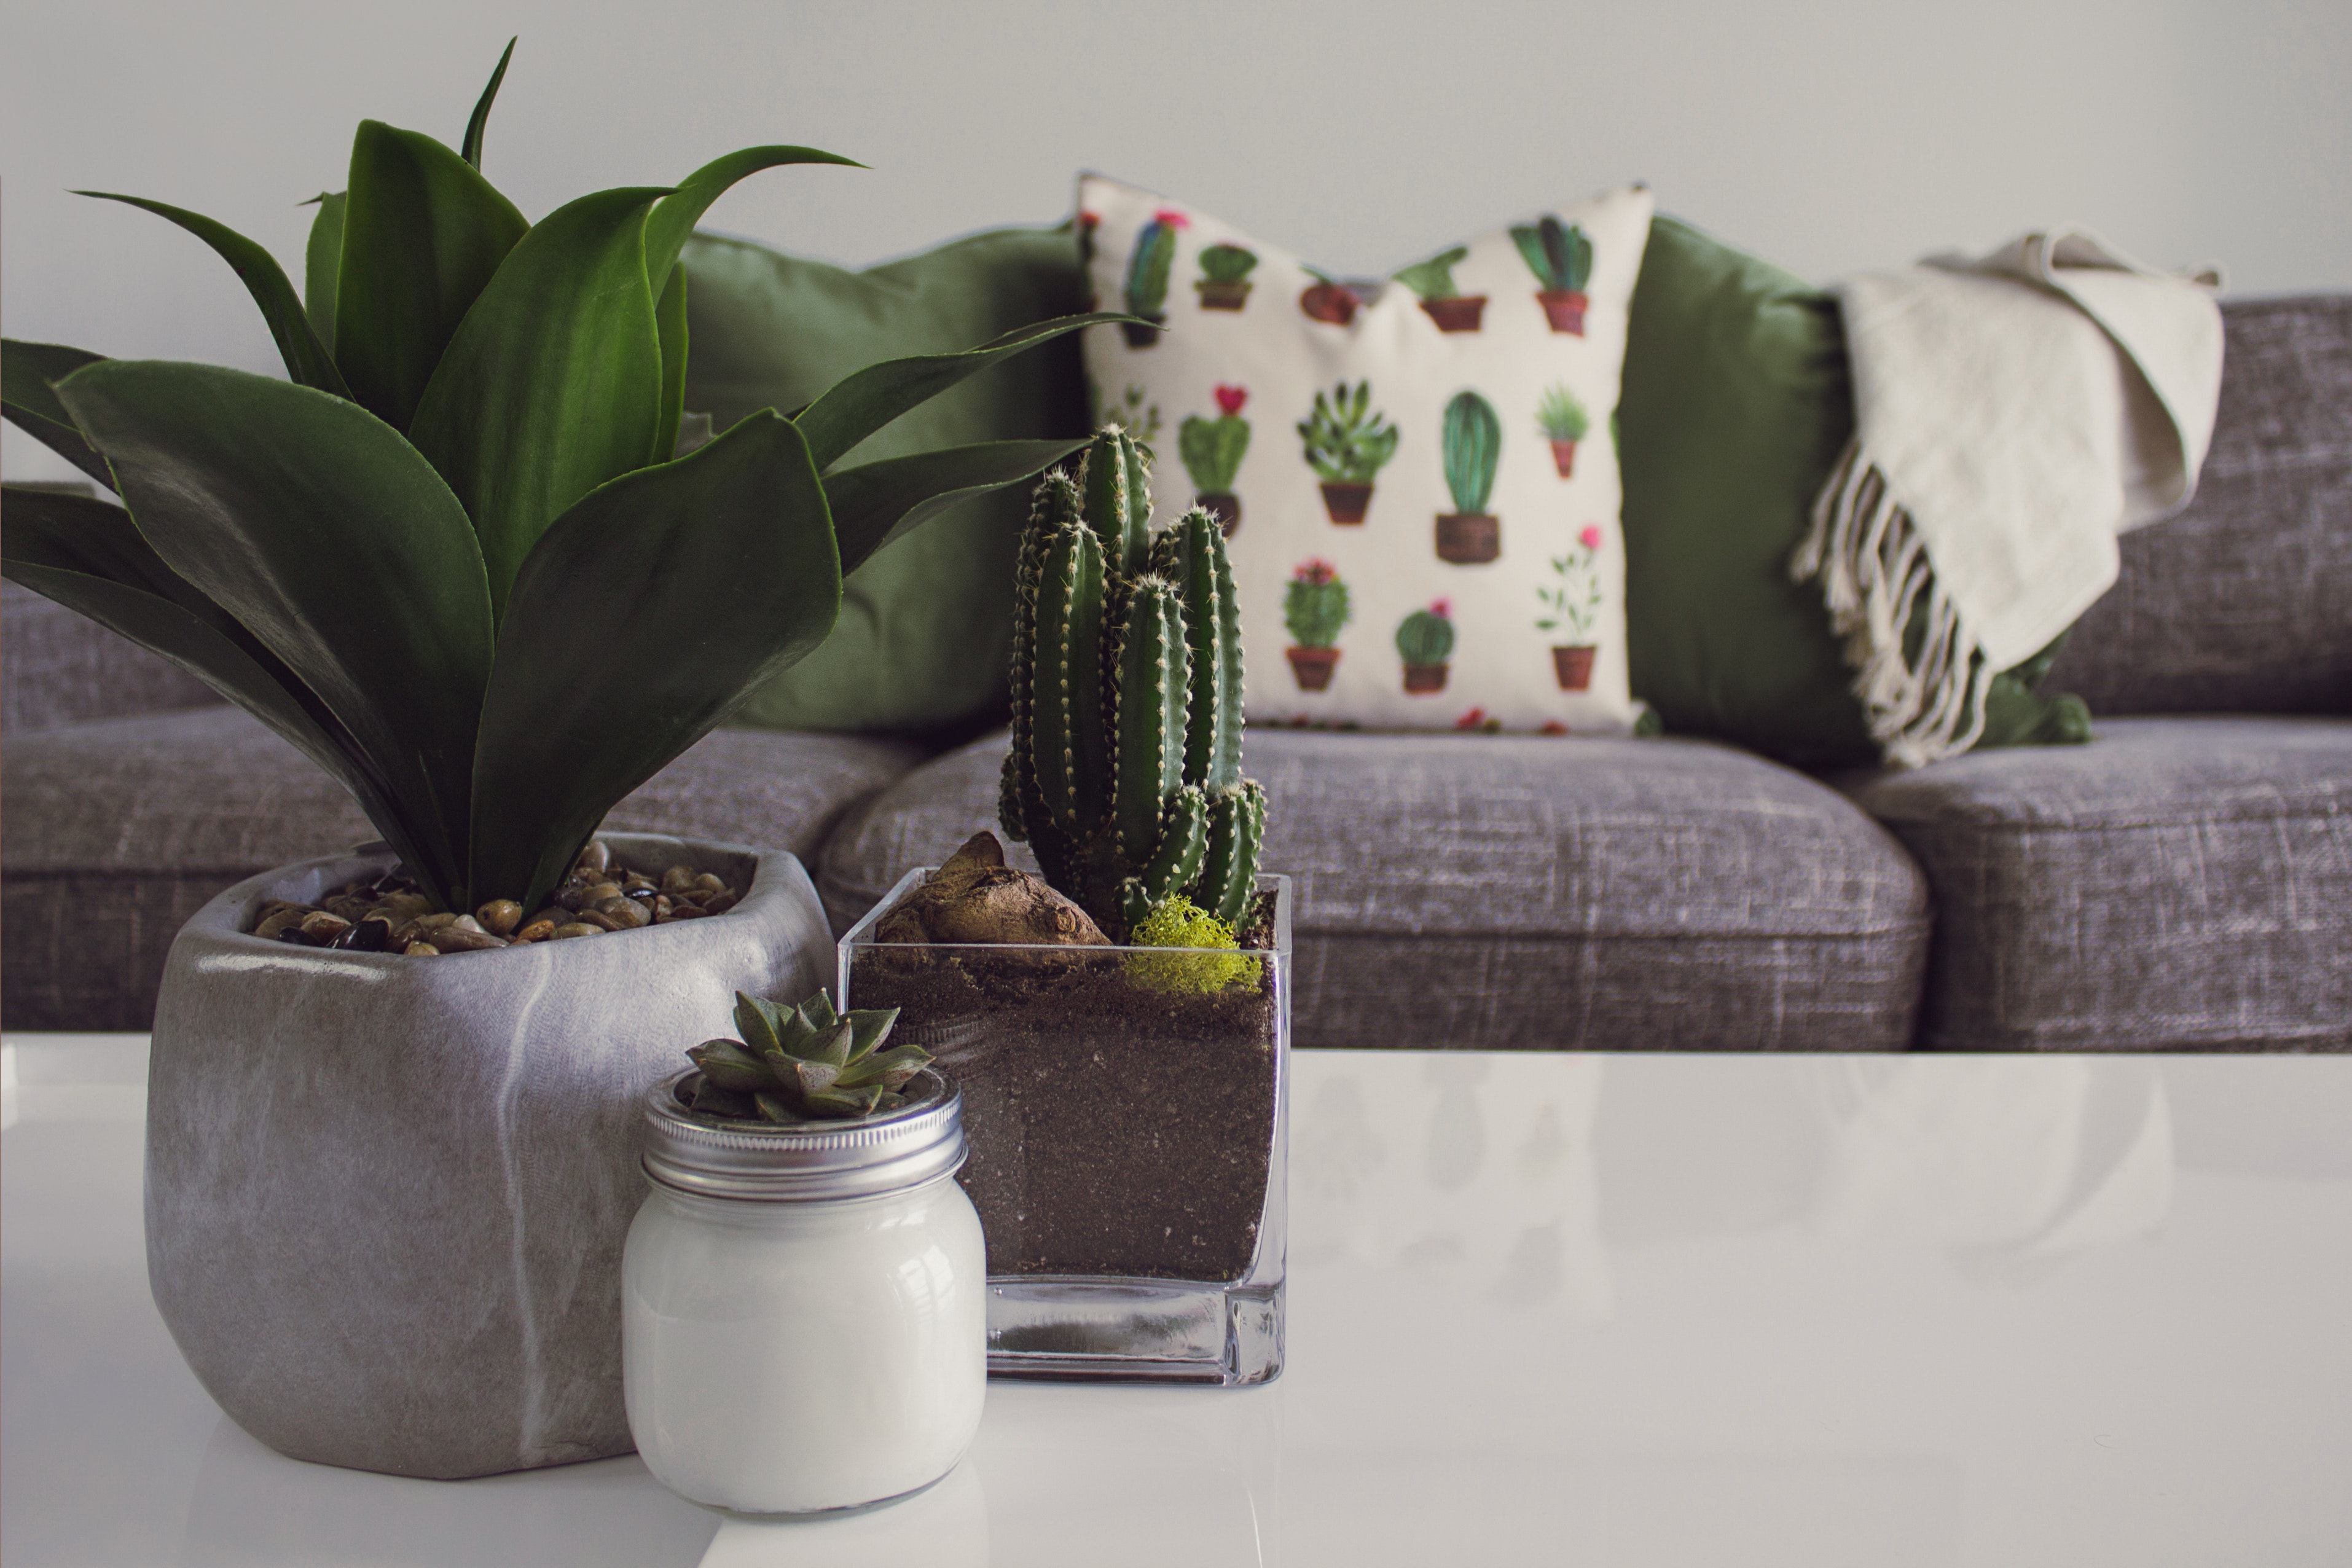
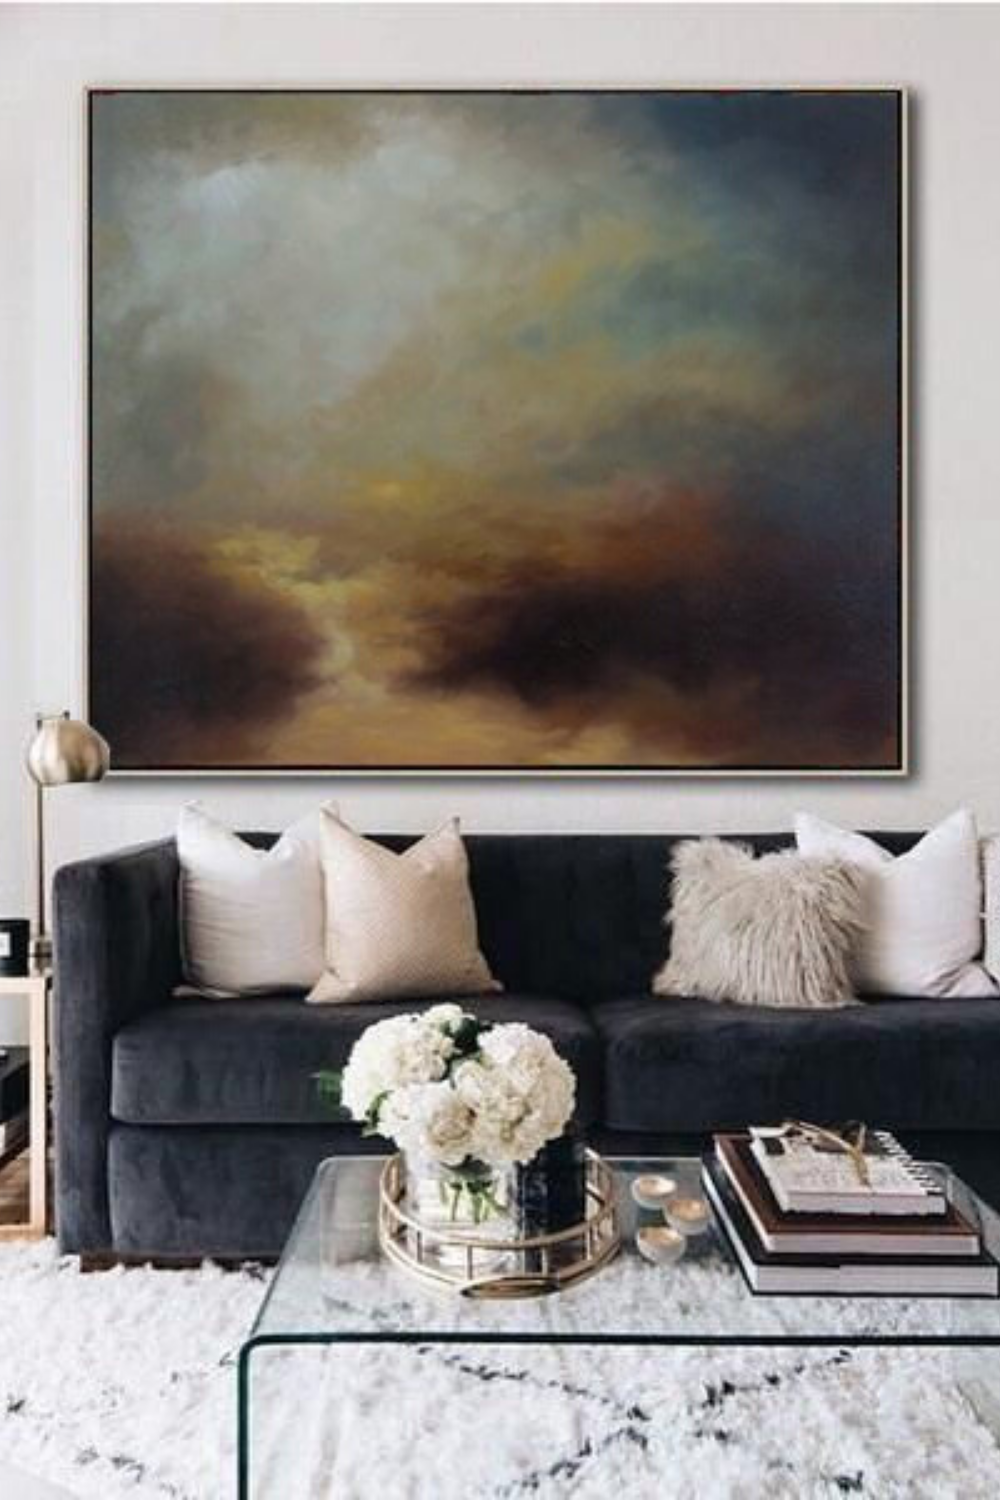
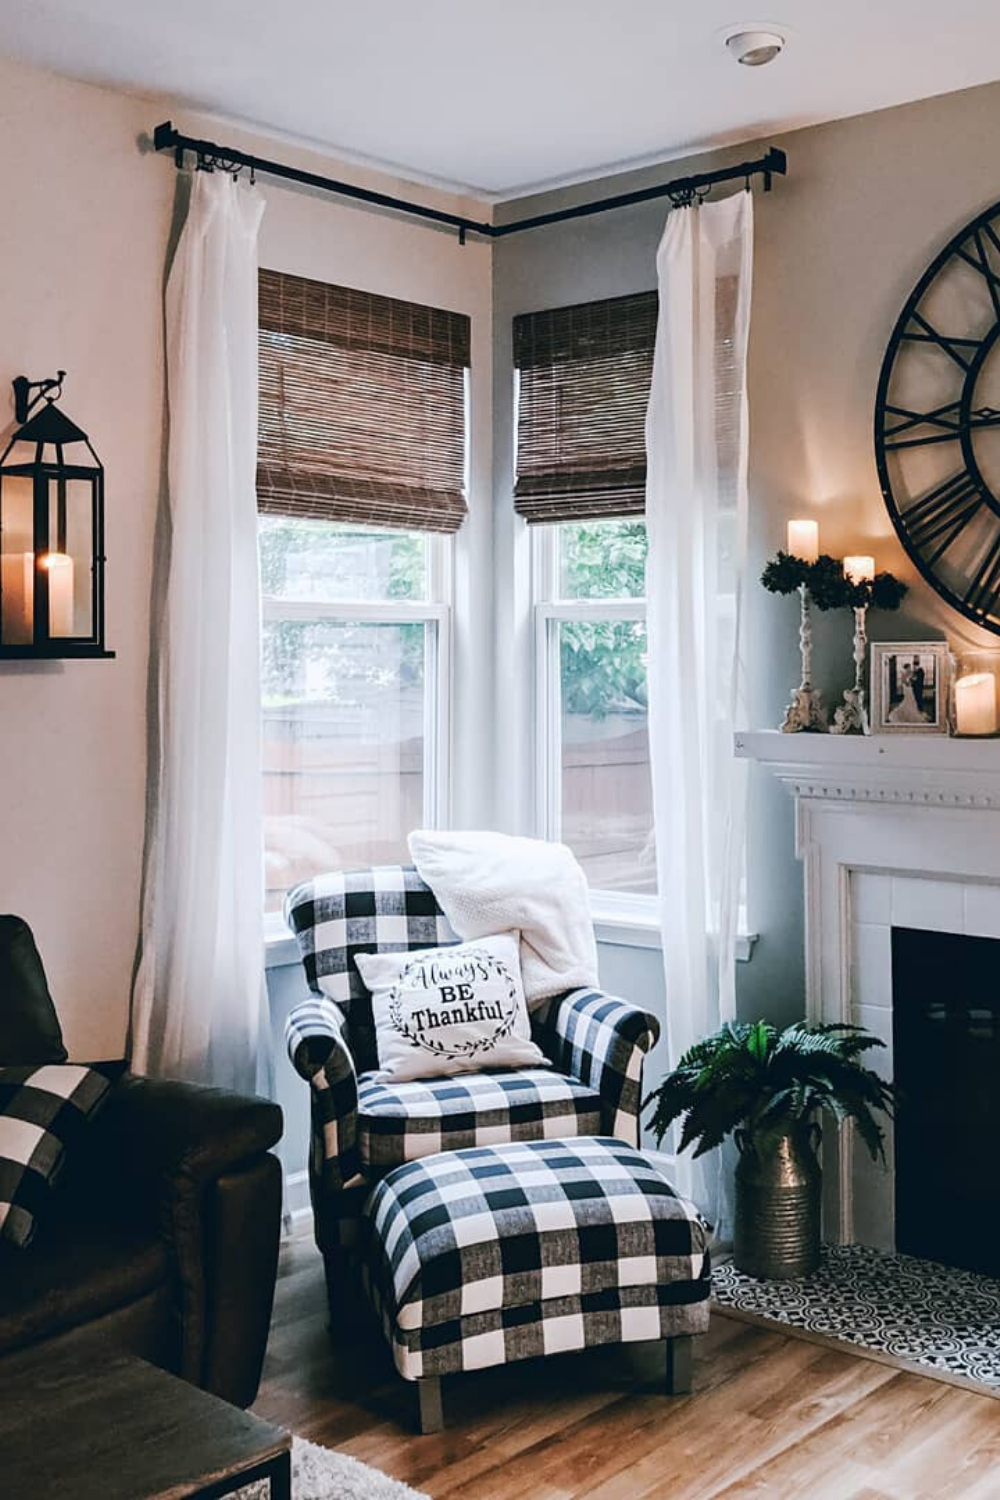
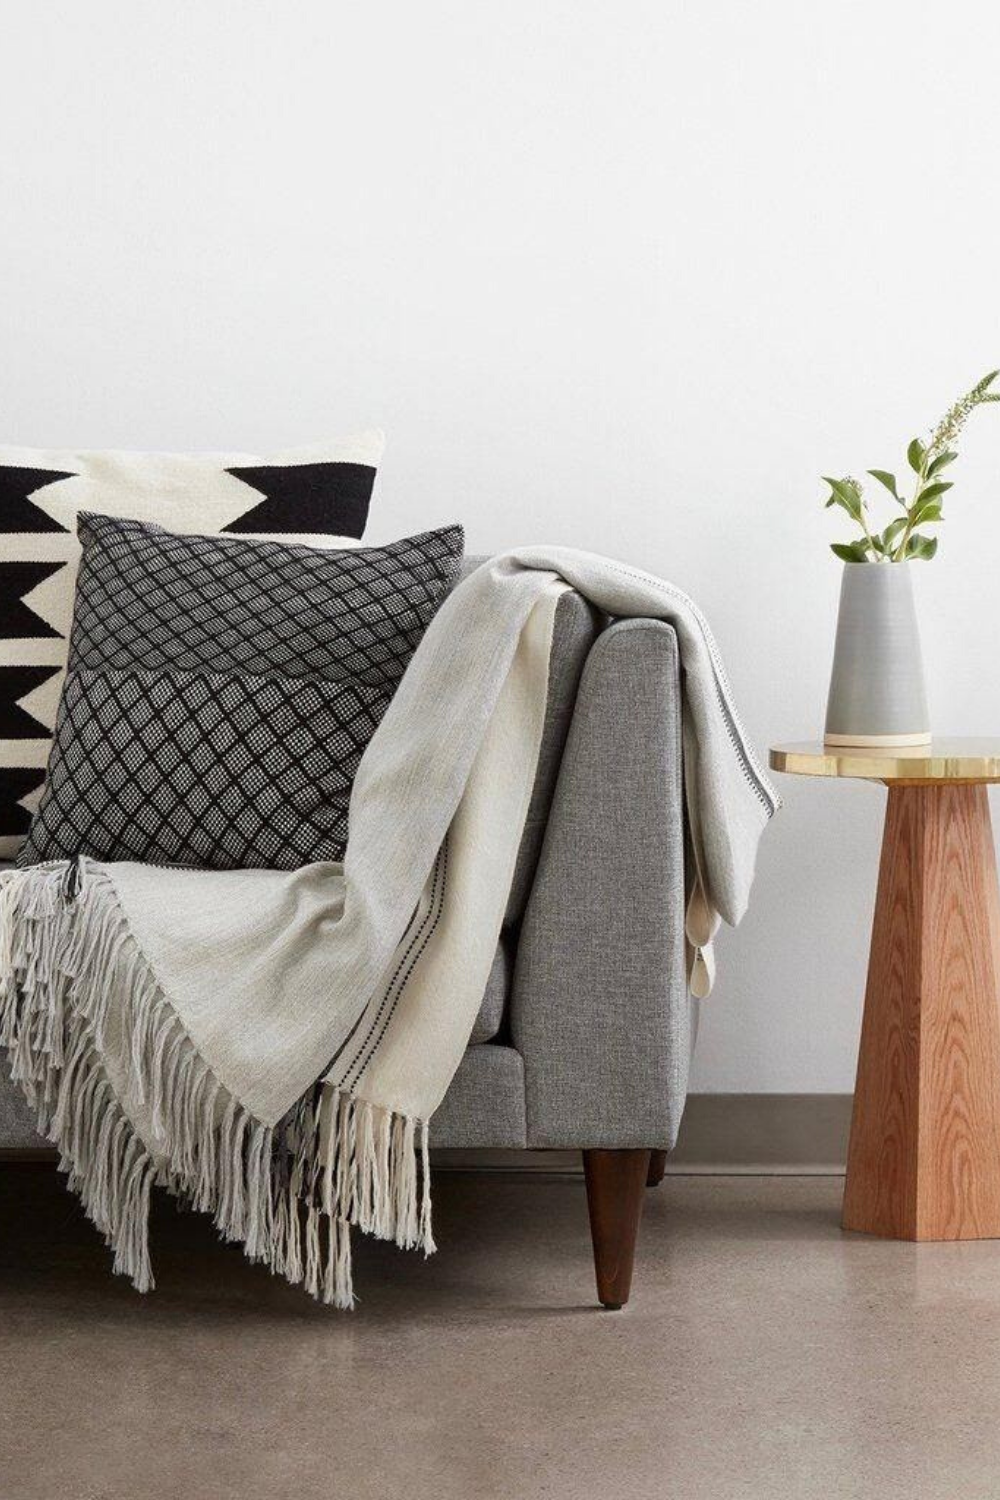
#3: Upgrade Your Throw Pillows

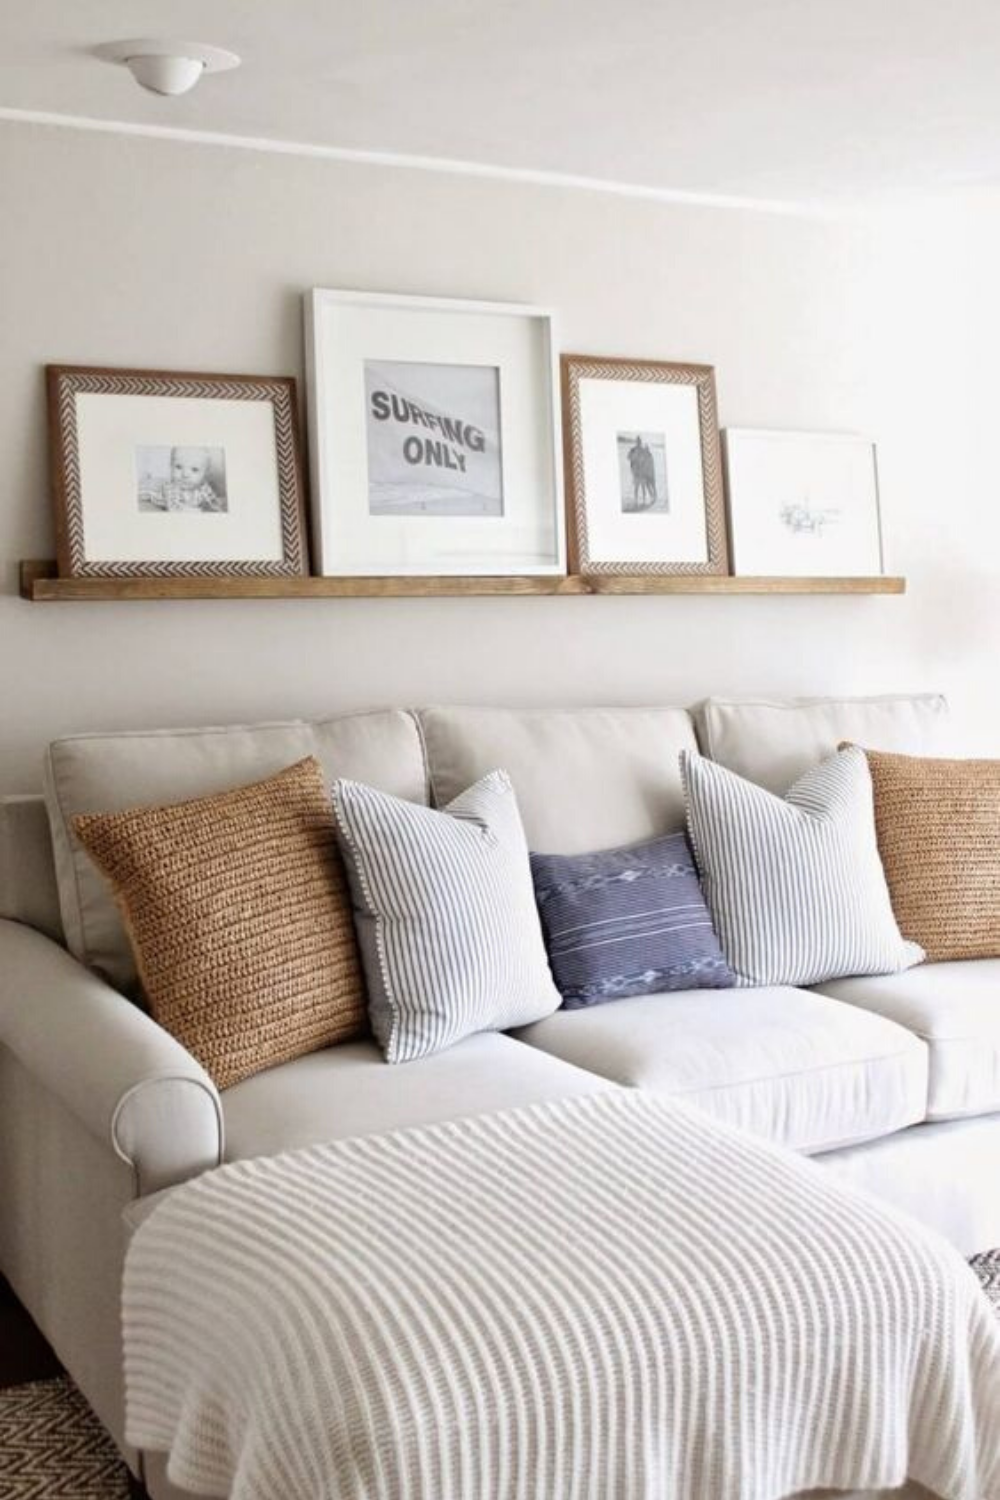
Tired of your old couch but don’t have the money to buy a new one? Something as simple as upgrading your throw pillows can give old furniture a new and expensive look.

Opt for bold pops of color to brighten a neutral couch, throw in textures like velvet and leather to add luxury, and always purchase feather inserts instead of foam for an extra classy flair.

#4: DIY “Built-In” Designs

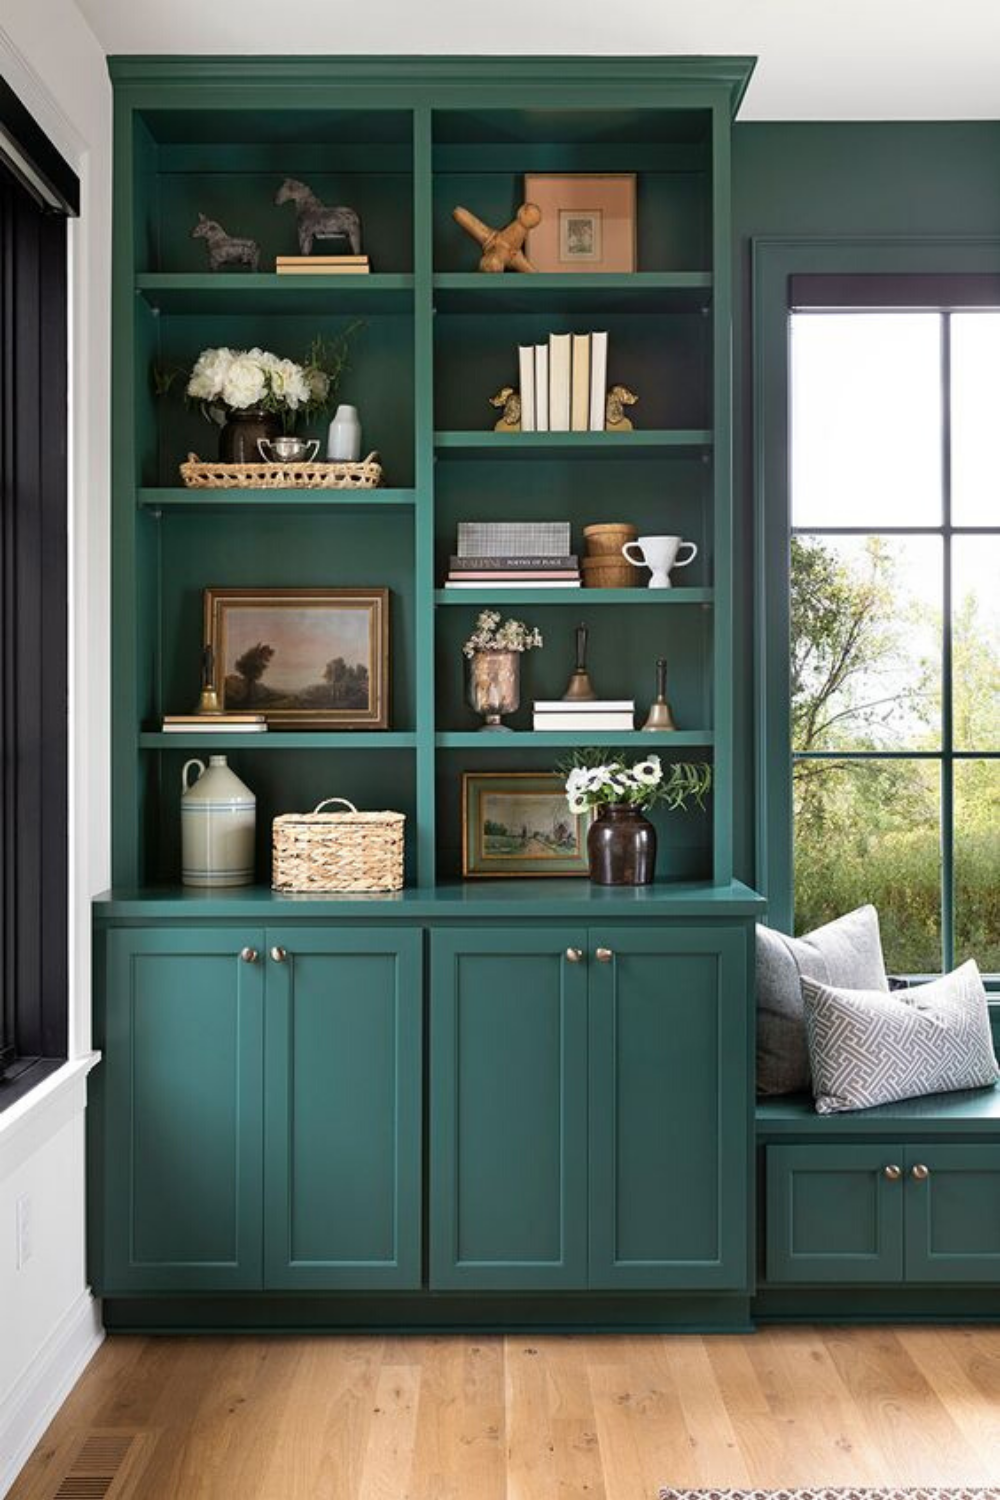
Built-in pieces like bookcases and shelves that span entire walls instantly make a house look classier and more expensive. But if your house didn’t come with custom-made built-ins, you can recreate the look pretty inexpensively yourself (it helps to be handy with a drill!).

Simply pick a room that needs to be spruced up, find a DIY built-in project like these DIY shelves by The Wood Grain Cottage, and get to work!

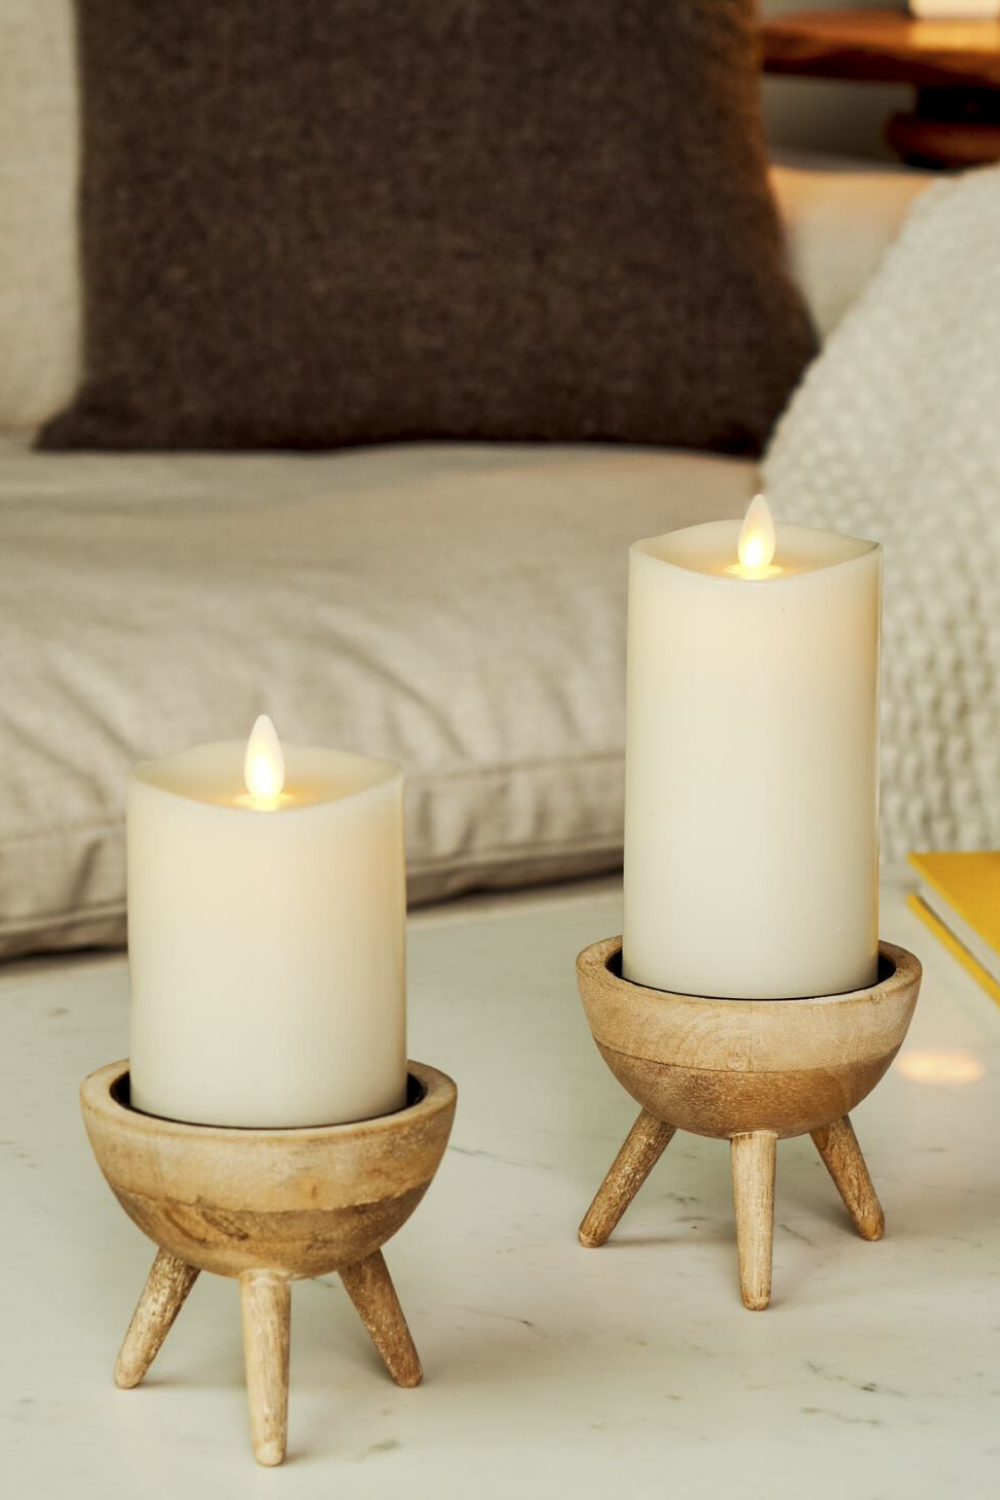
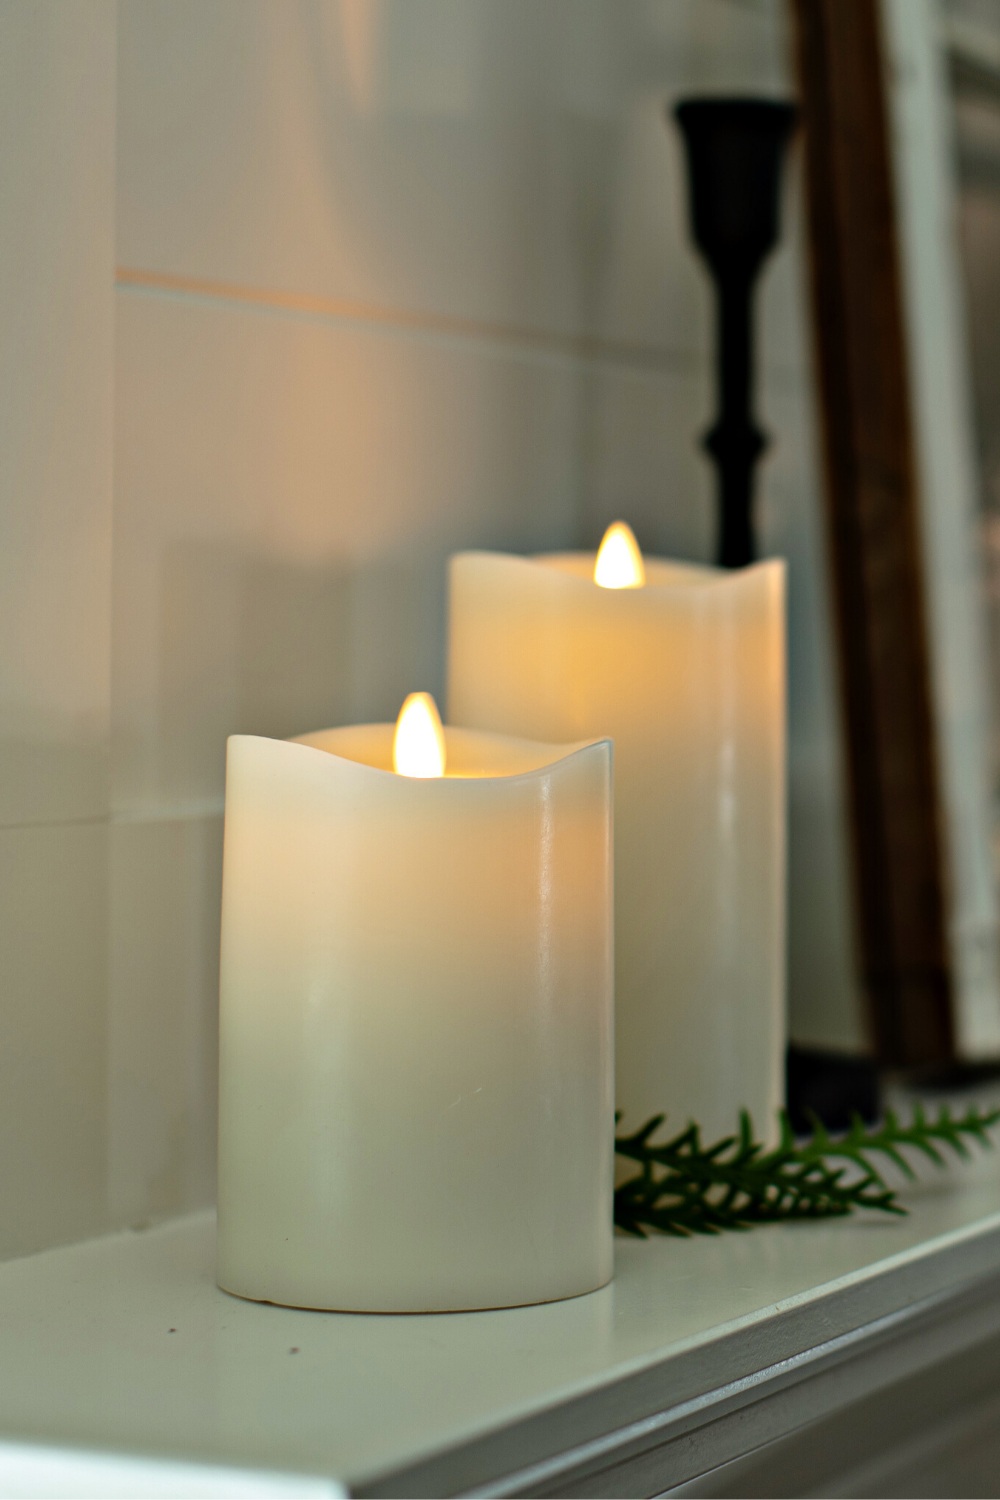
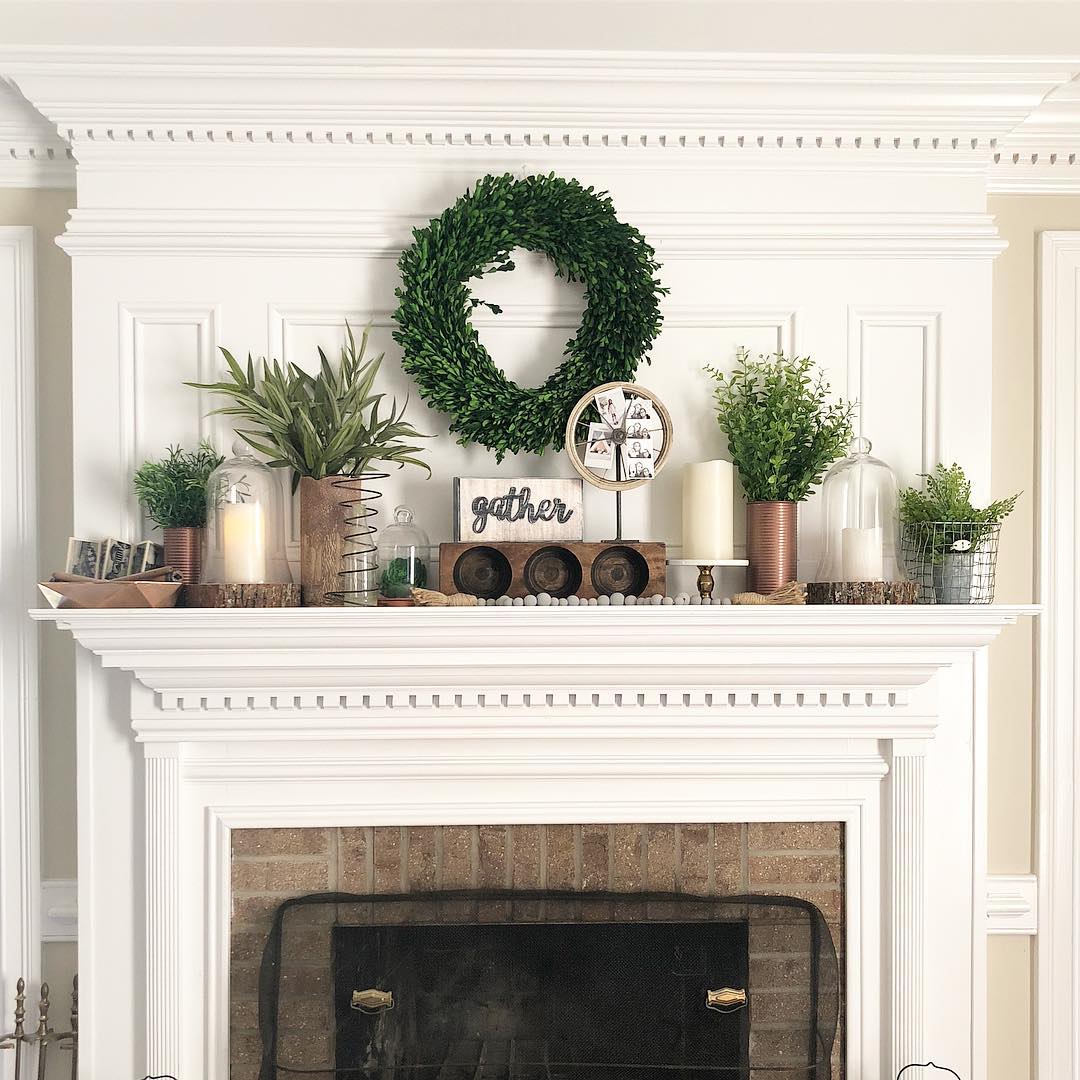
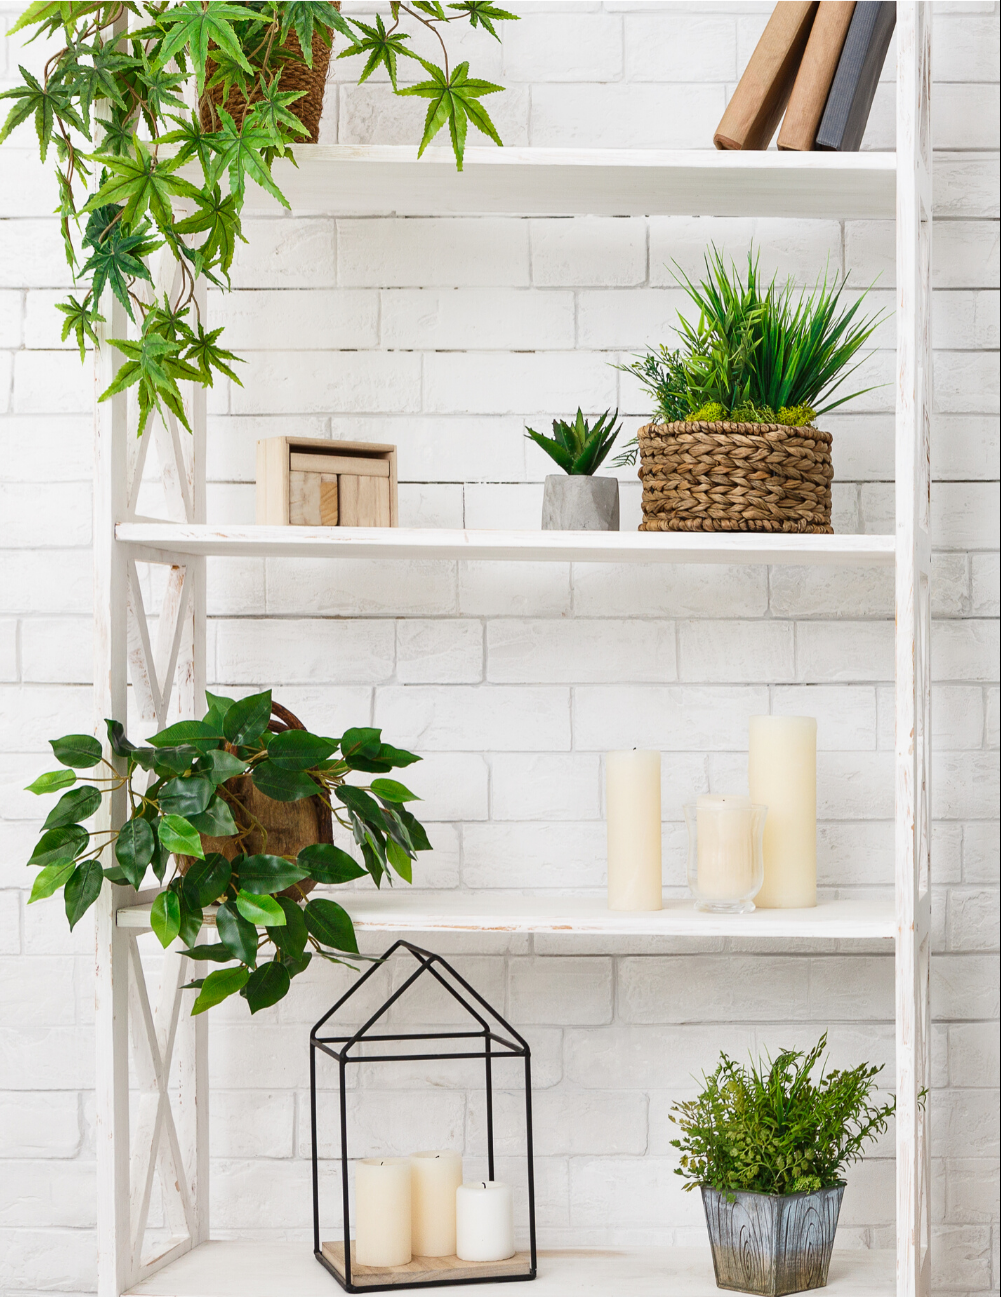
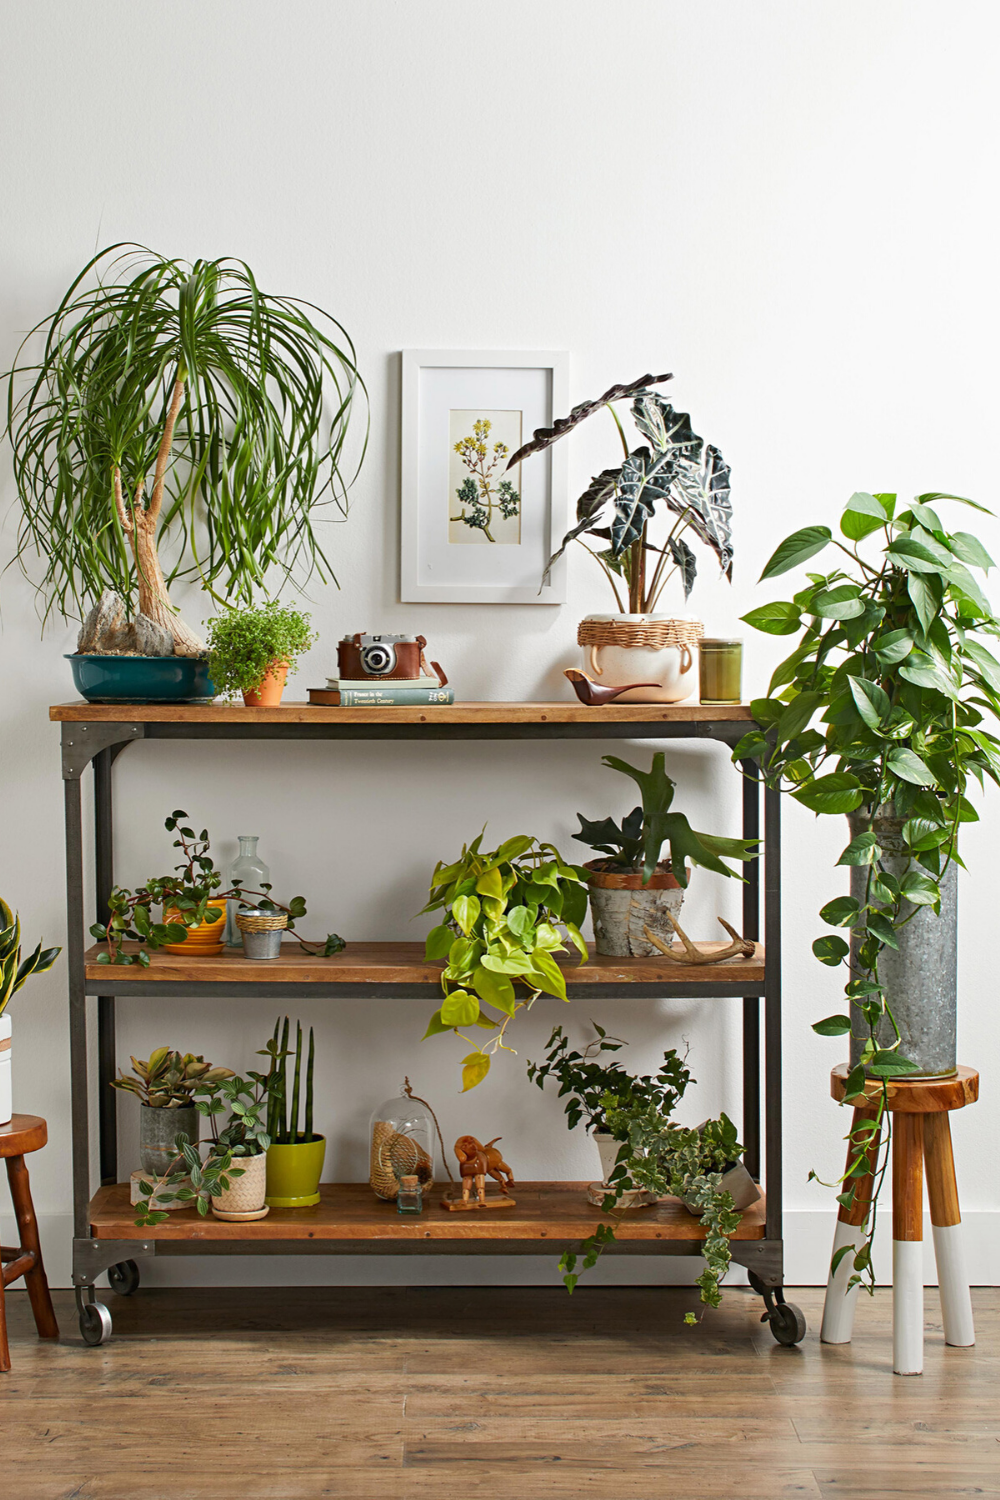
#5: Spruce Up Bookshelves

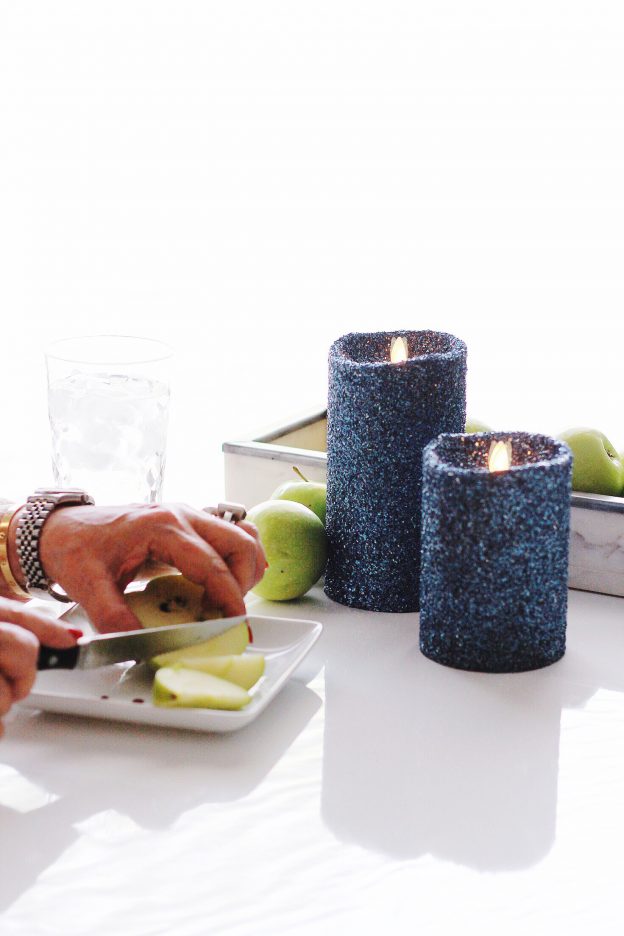
While we’re on the topic of shelving…If you’re searching for ways to make your home look expensive on a budget, rethink your bookshelves.

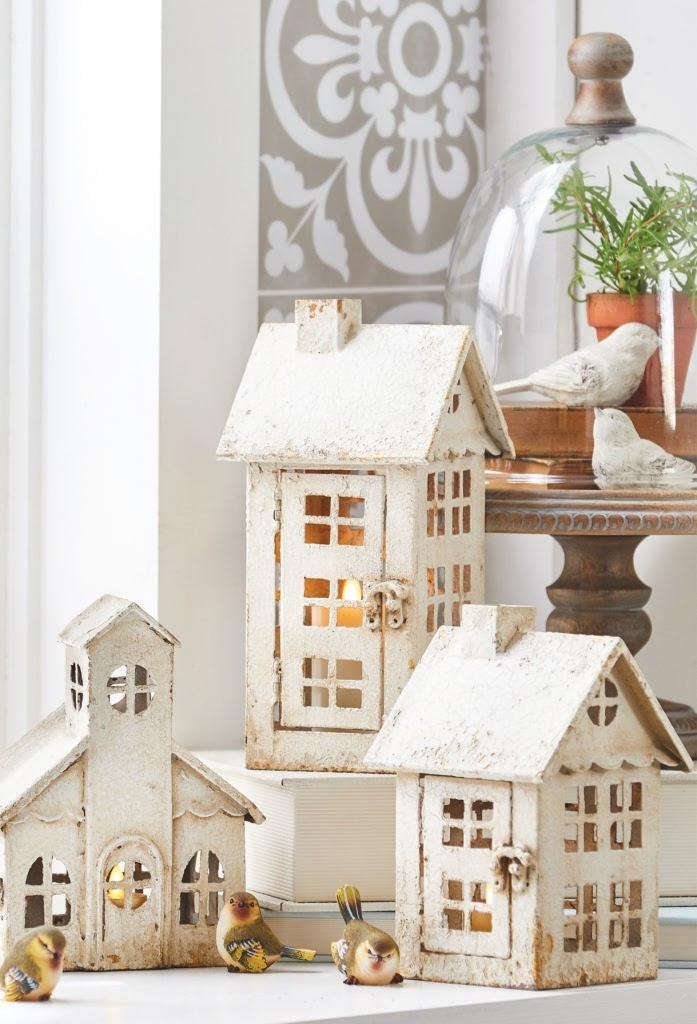
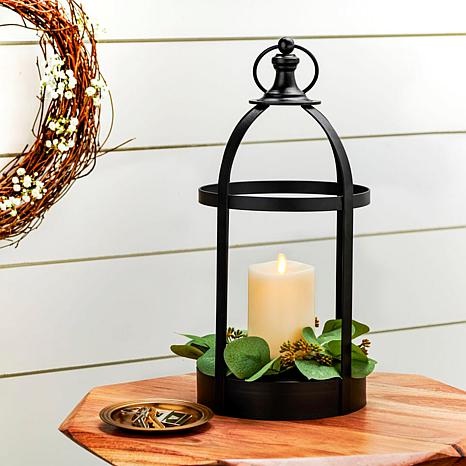
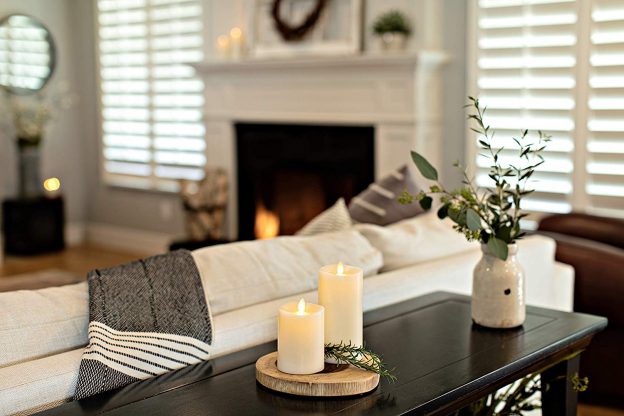
Instead of simply stacking the shelves full of books, try incorporating artwork, plants, accent decor, and candles (we suggest using flameless ones like these so the shelf above doesn’t get burned!).

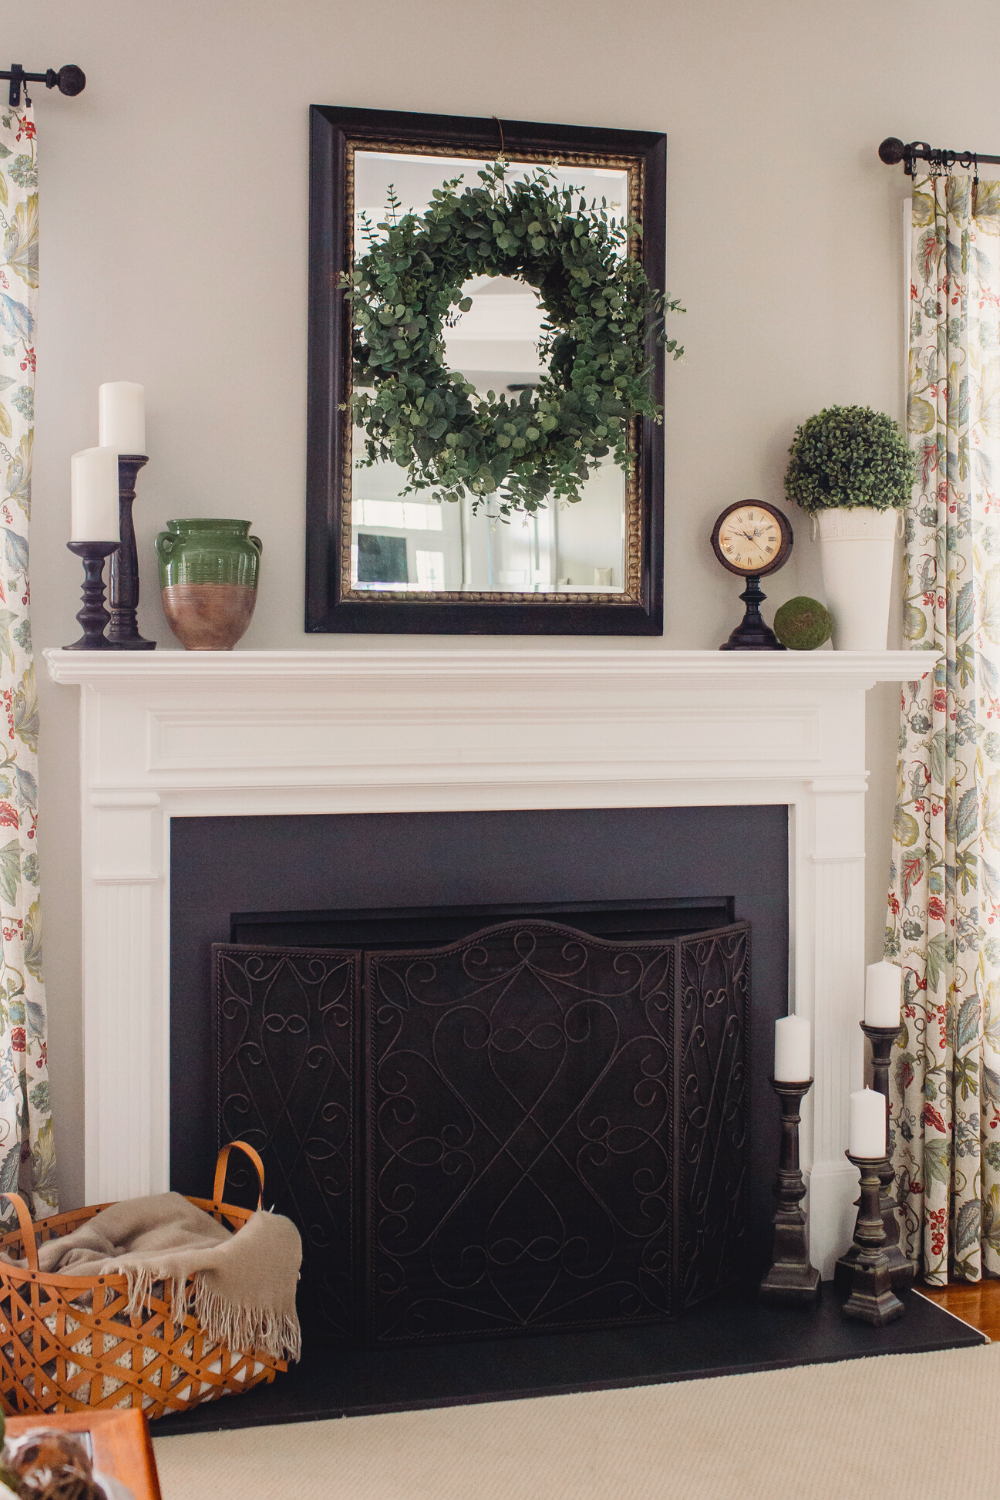
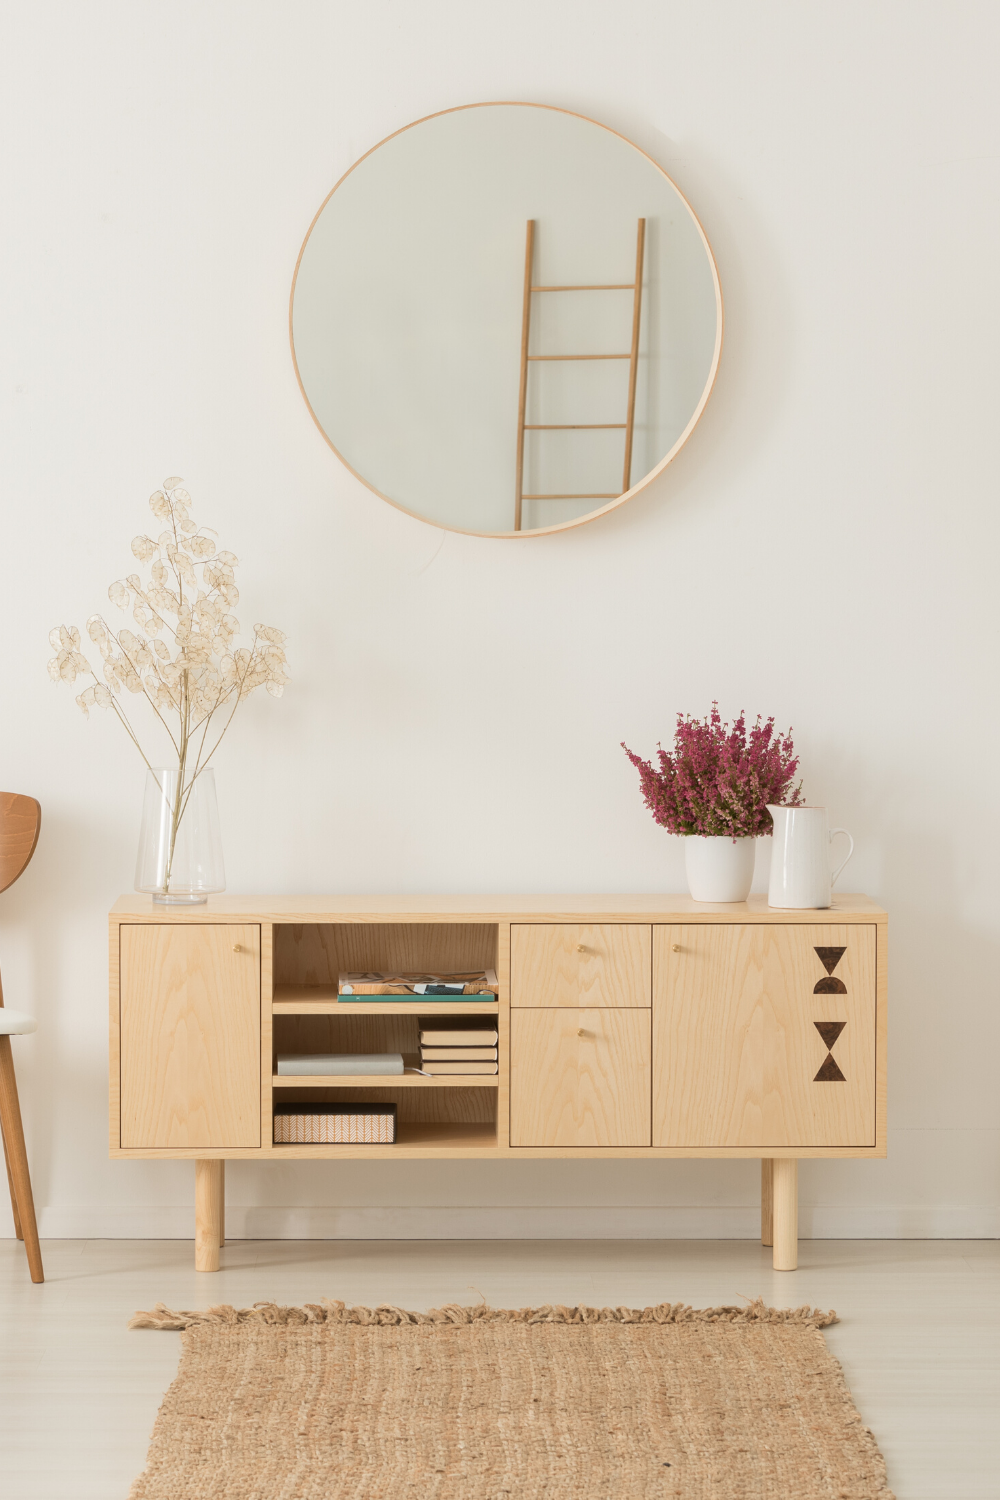
#6: Open Up Spaces With Mirrors

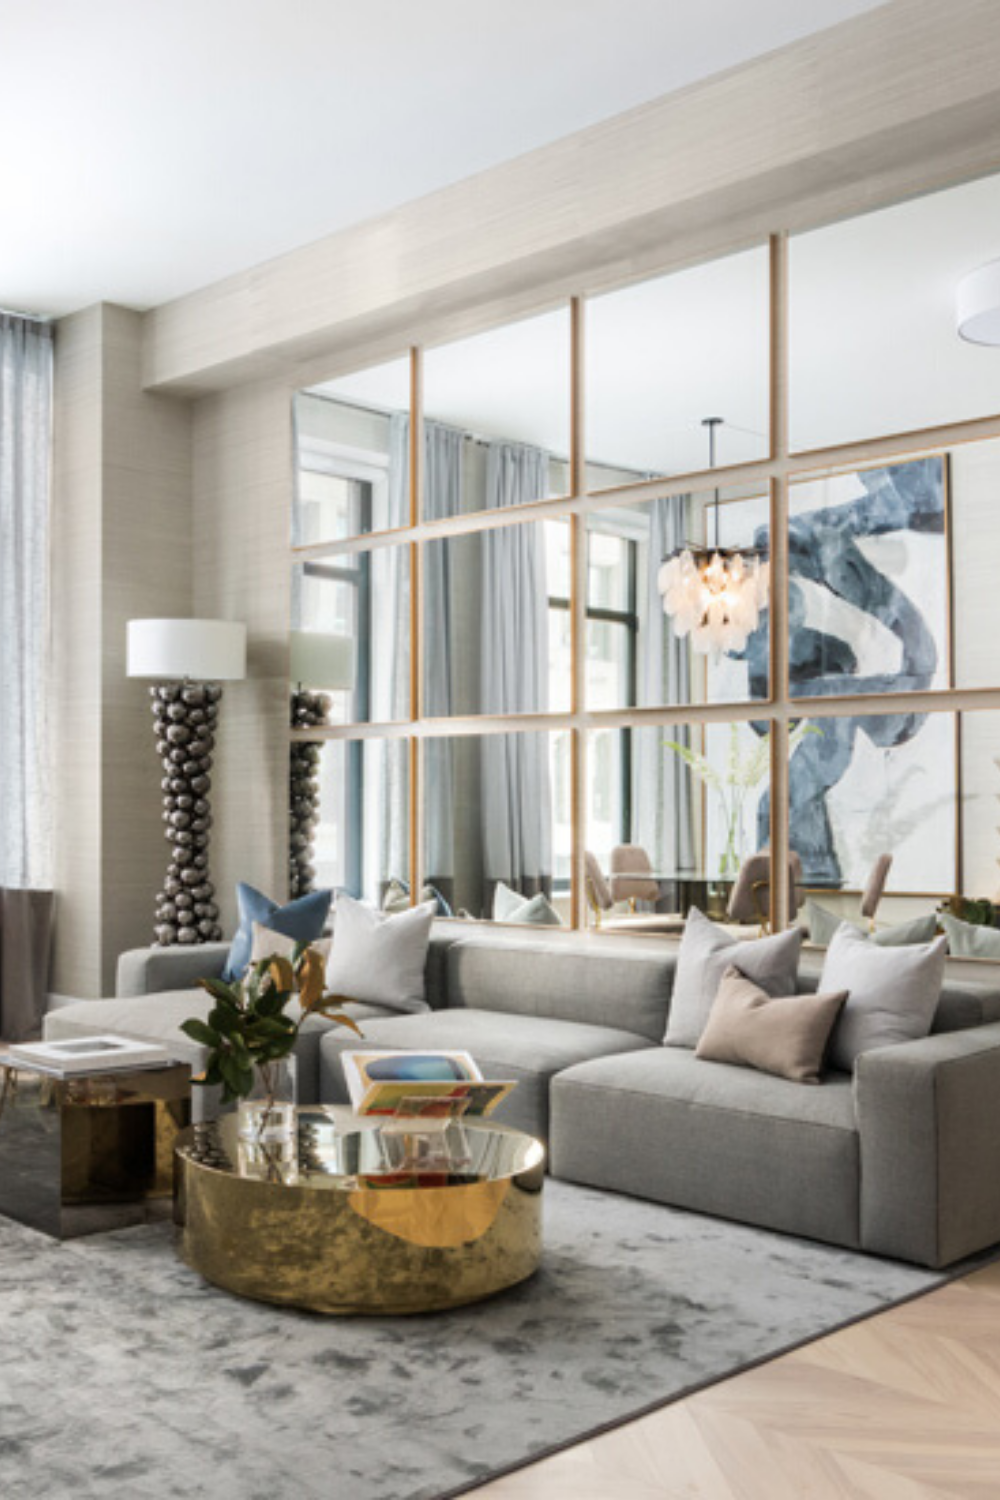
If your house feels small or cramped, you can easily (and inexpensively) open up your space with mirrors. Create a wall collage of small mirrors or strategically hang large mirrors around the house to instantly create the illusion of a larger space.

Budget-Friendly Tip: Check out your local Goodwill, antique stores, and garage sales to find inexpensive mirrors. If you don’t love the frames they come in, try spray painting them!
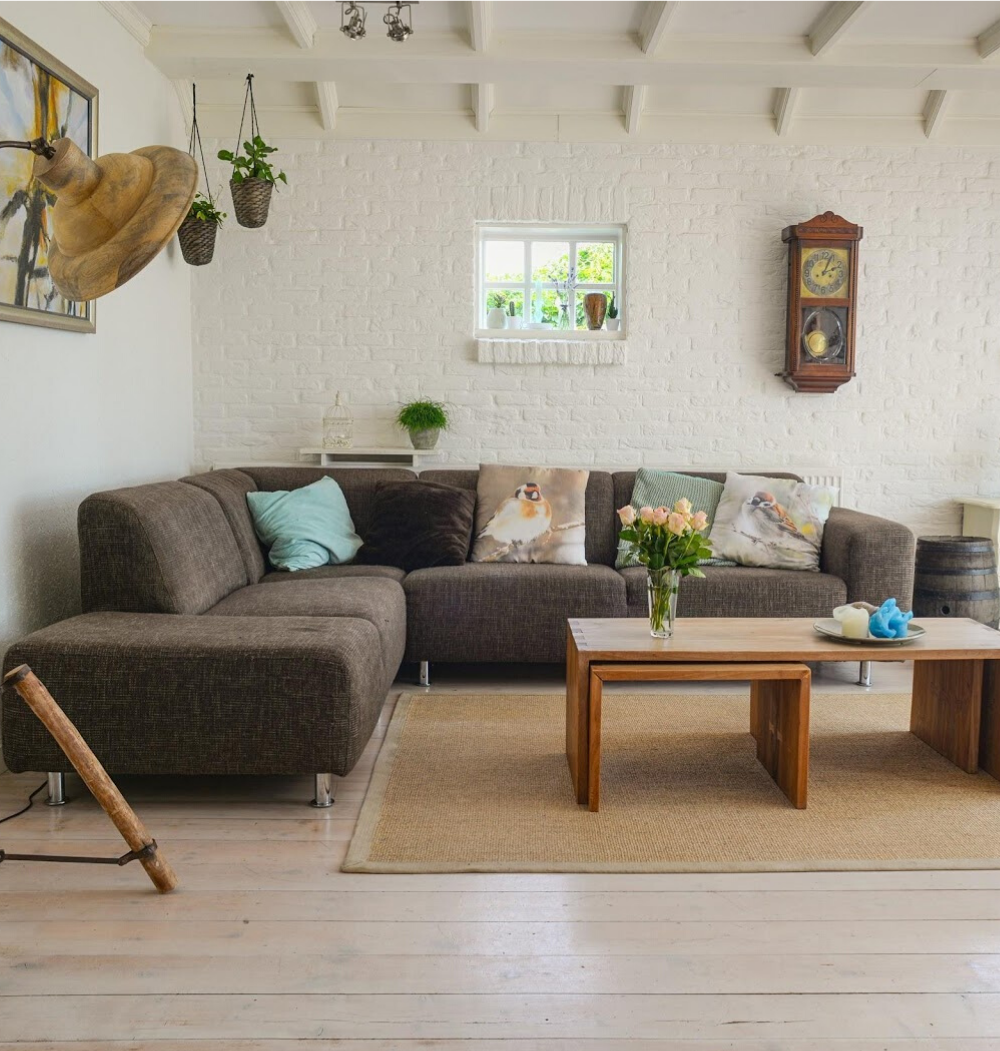
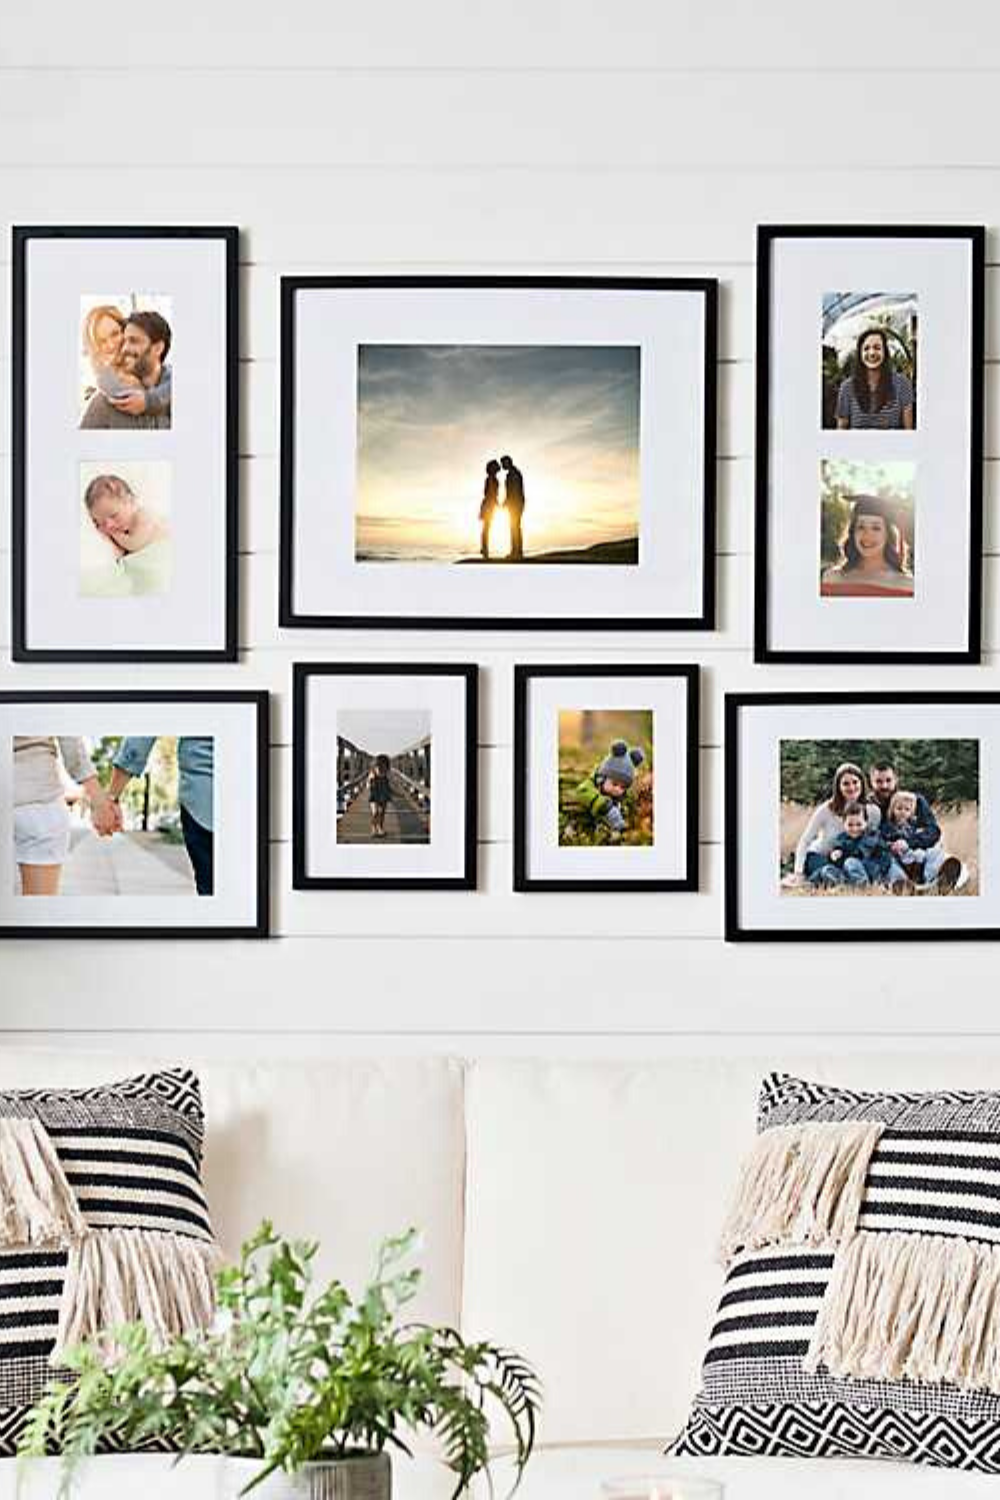
#7: Hang Artwork

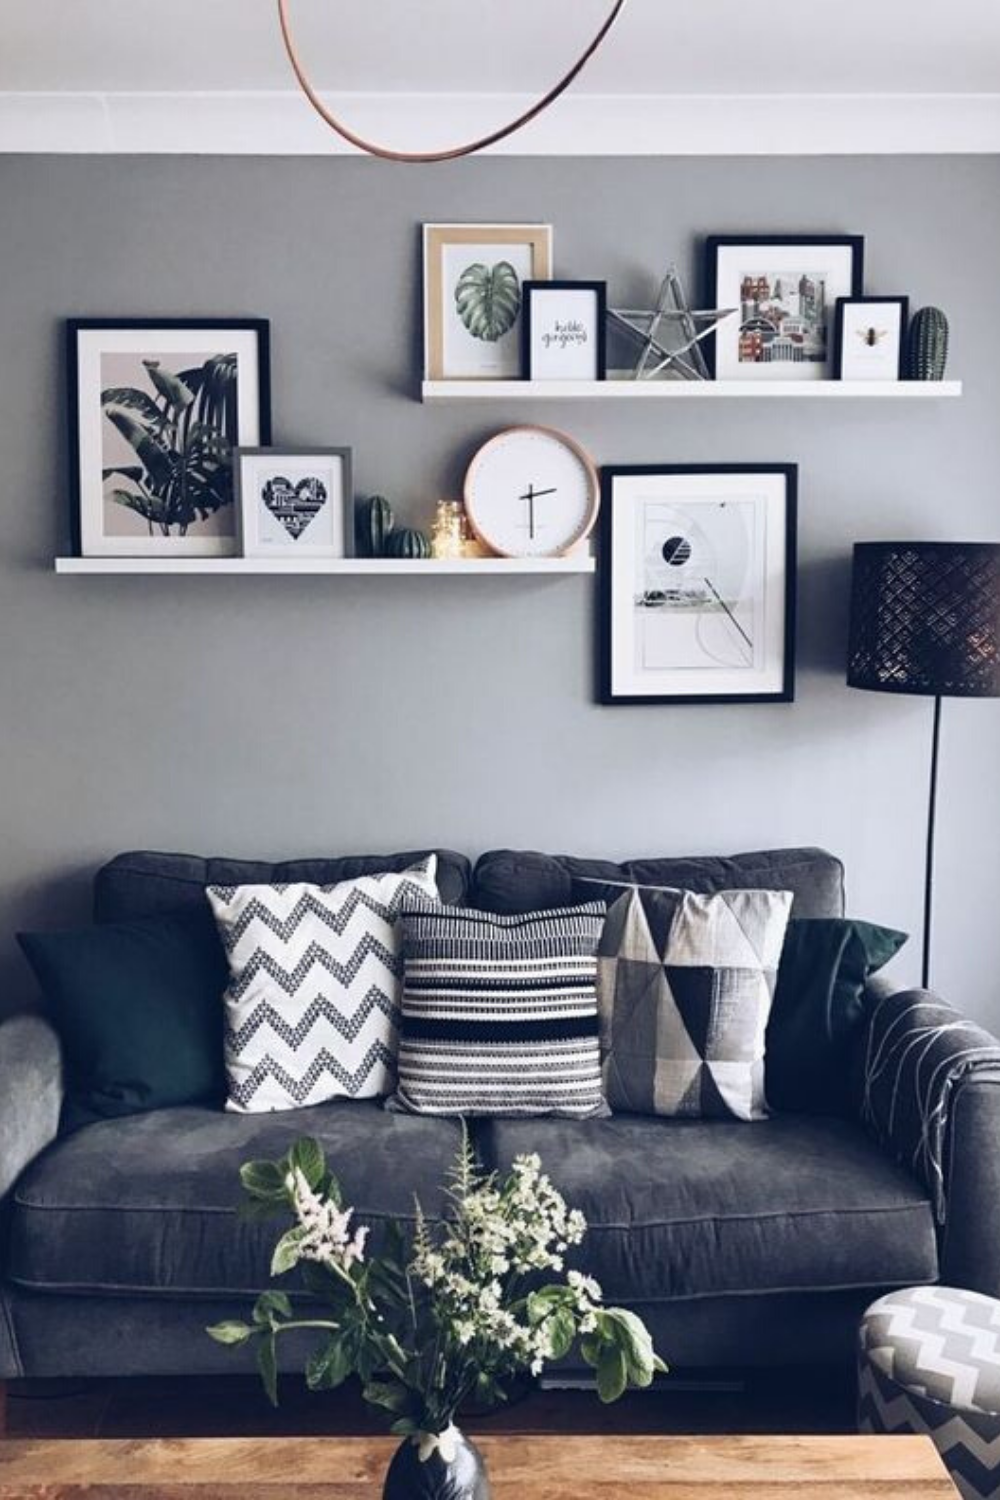
Another way to affordably “class up” your home is to hang artwork on the walls. Whether your style is modern, classical, boho, or farmhouse, find pieces of art to display throughout your house to instantly make your home look more expensive.

Budget-Friendly Tip: Scour your local thrift stores for frames and art pieces. You’d be surprised at the treasures you can find! Or if you’re feeling artsy, head to an art store and purchase a blank canvas and some bold colors to create a modern-looking piece!

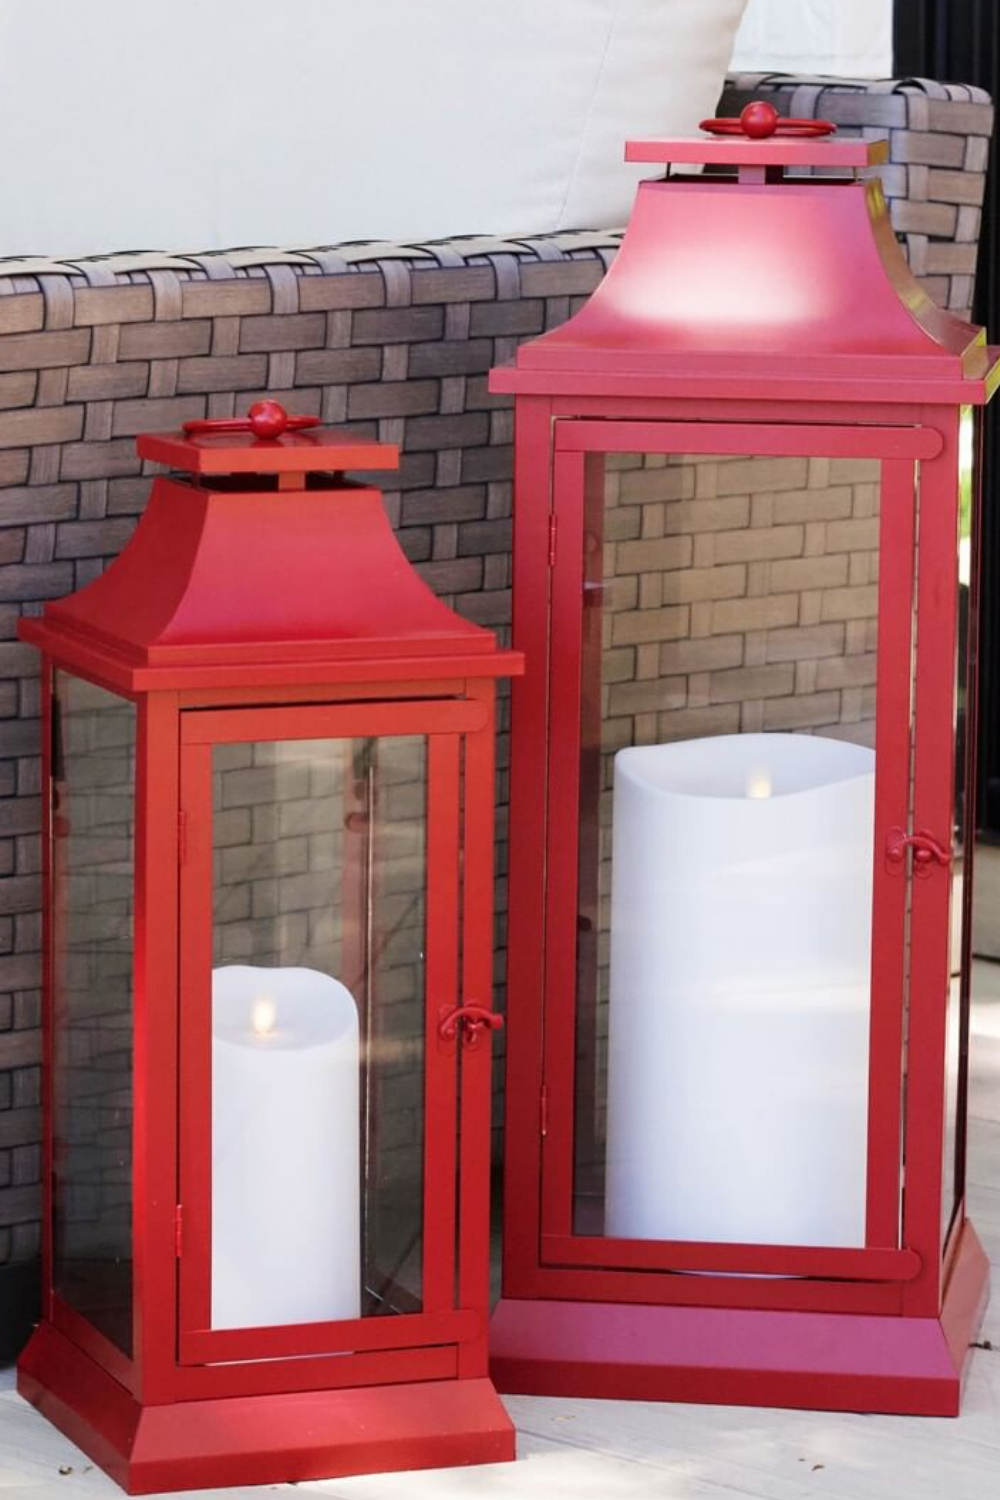
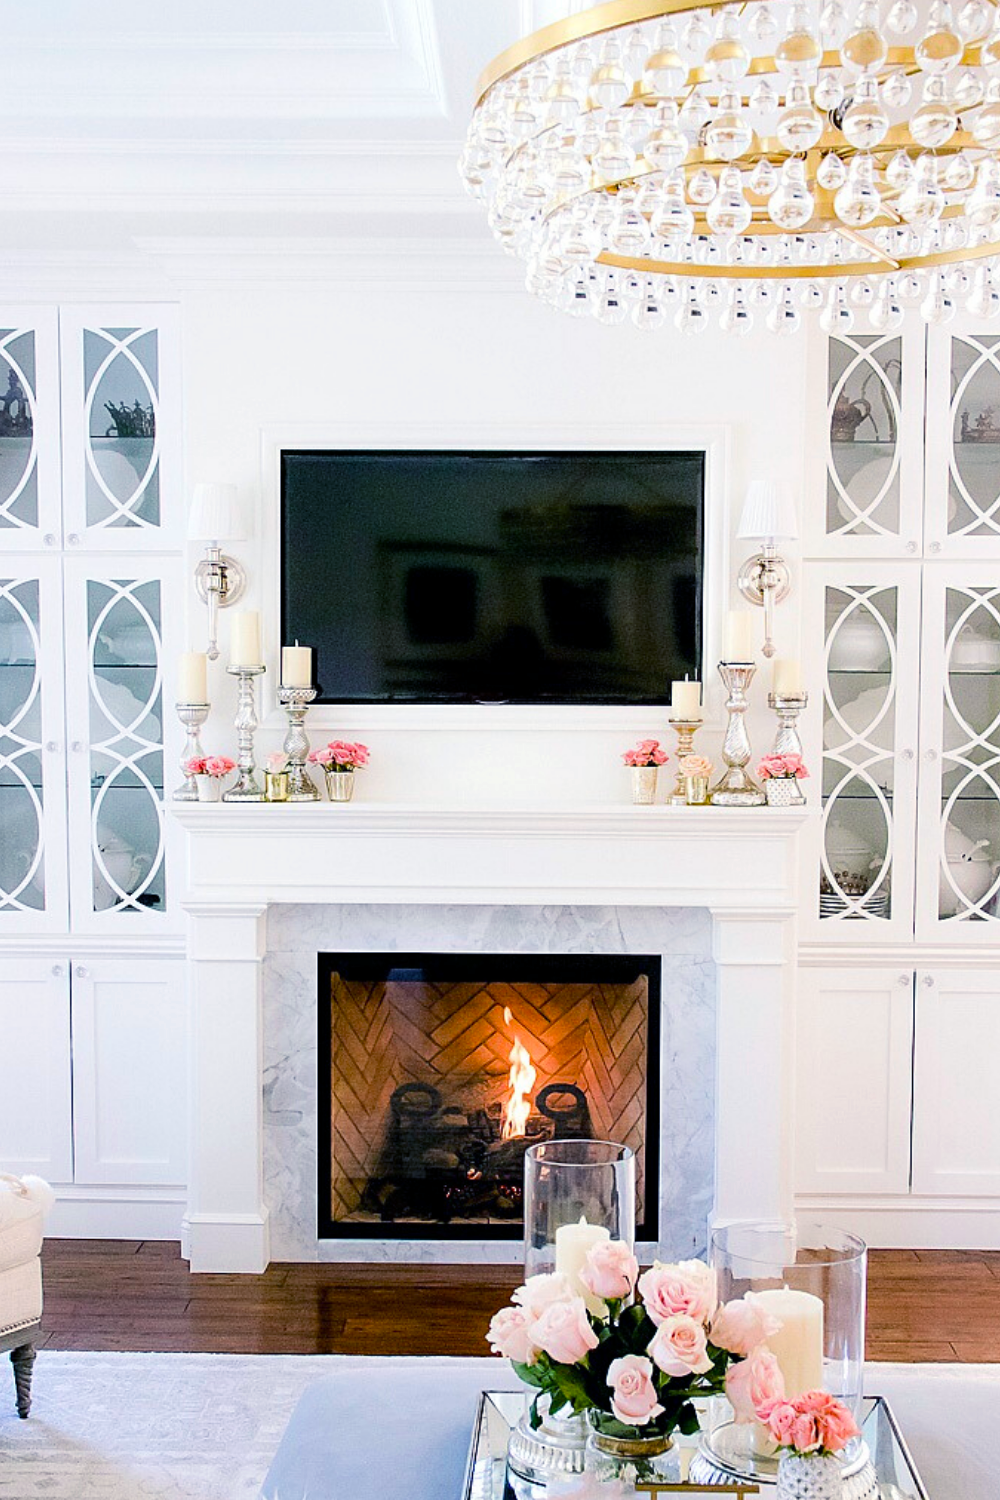
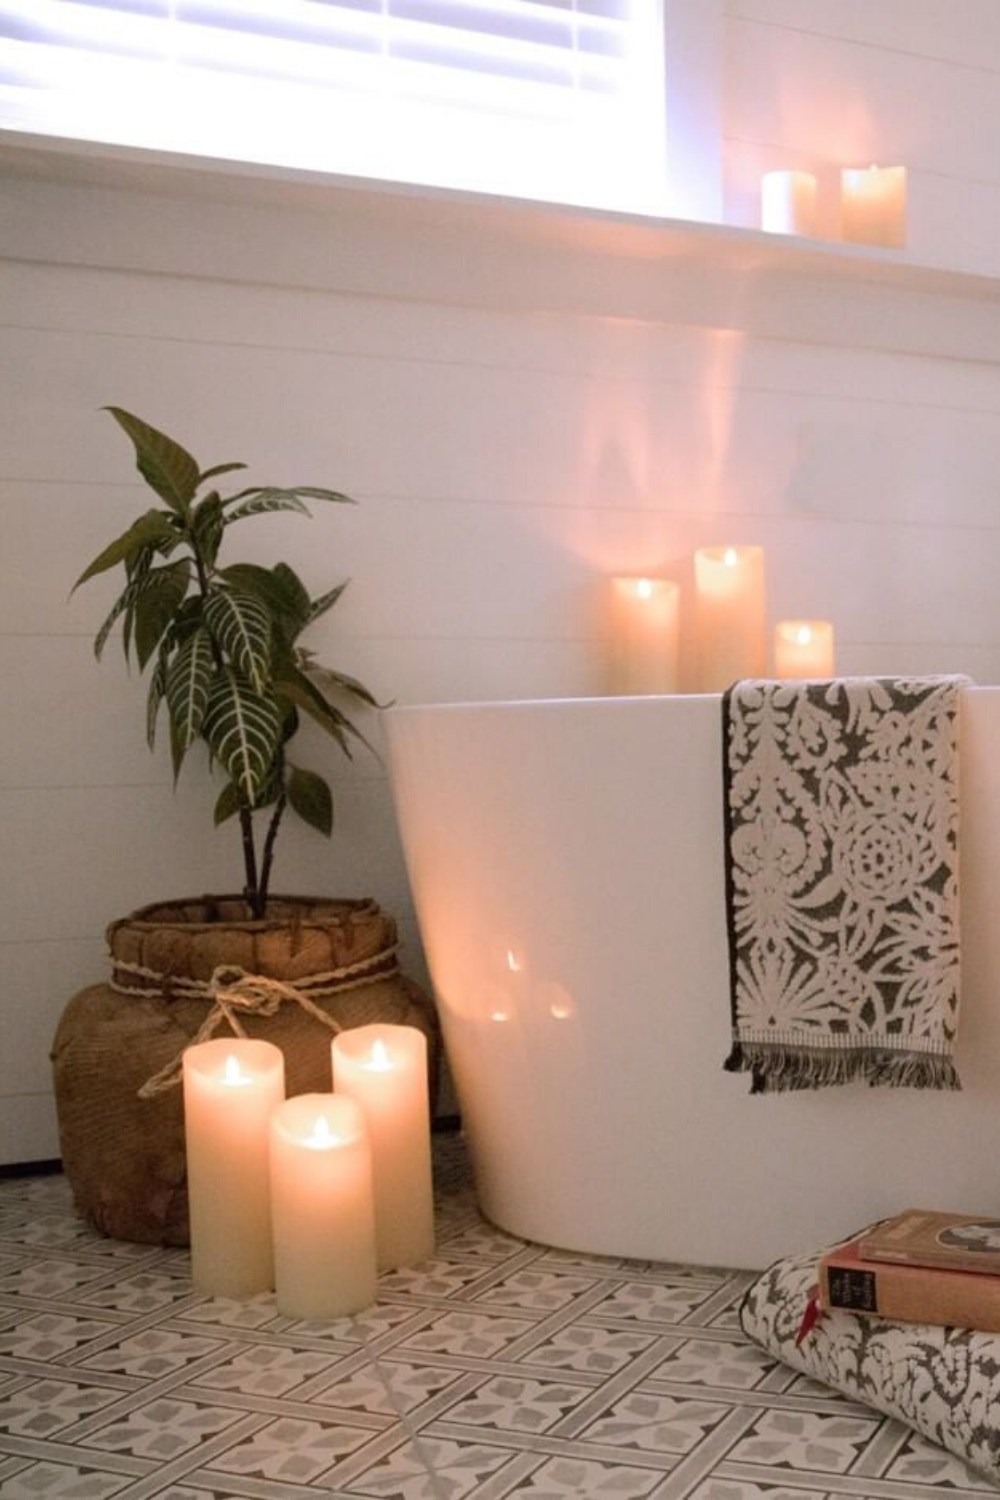
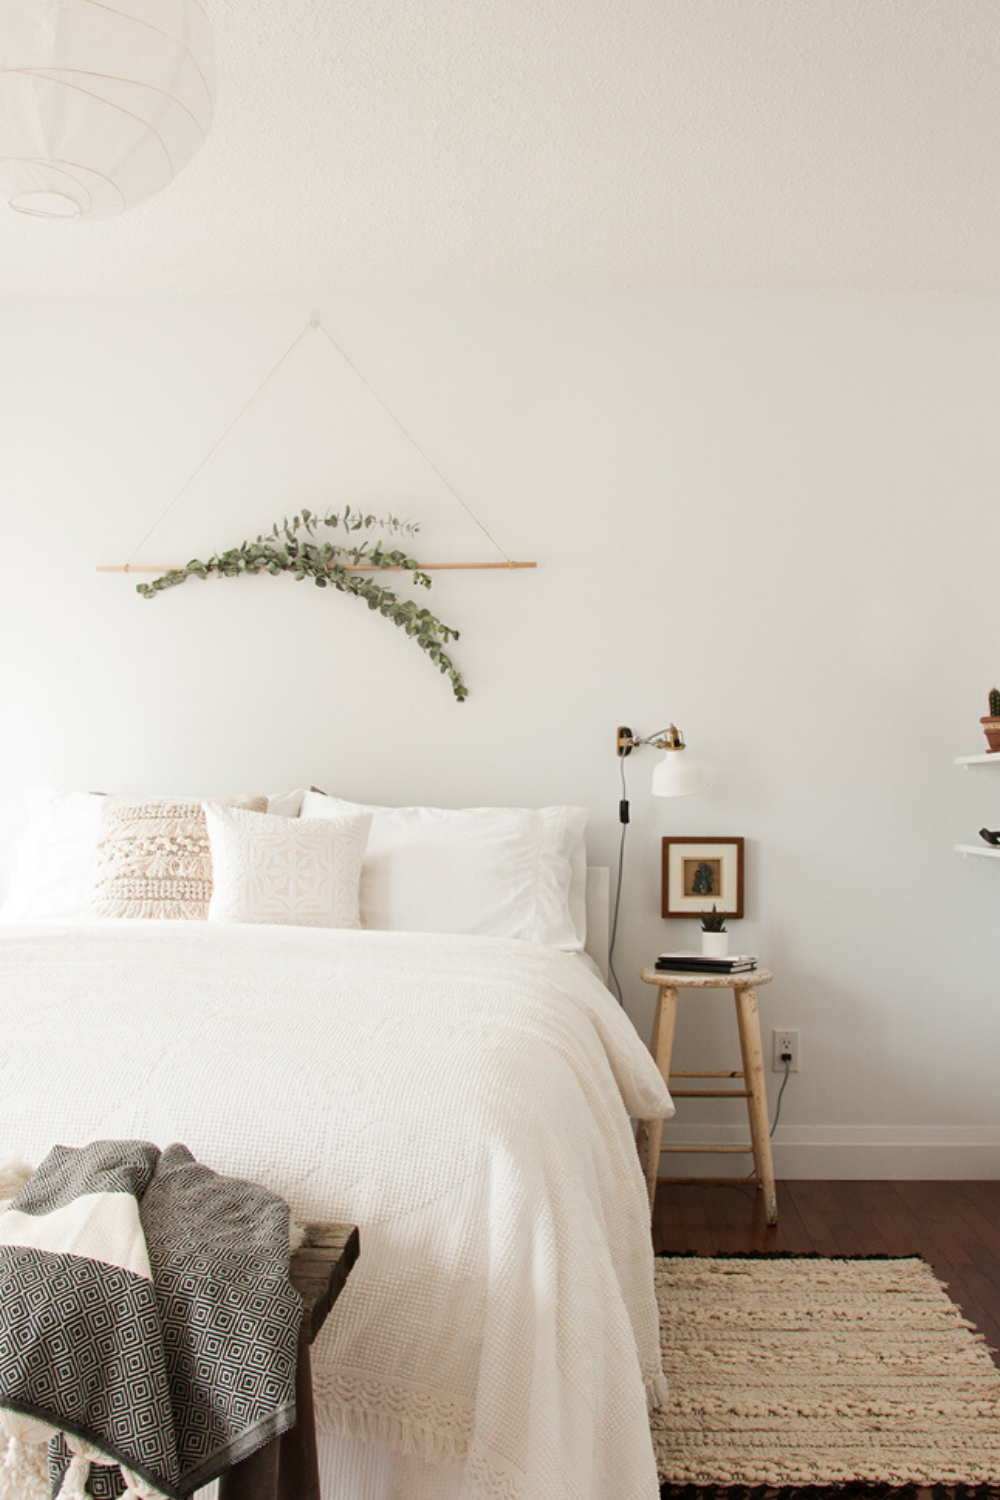
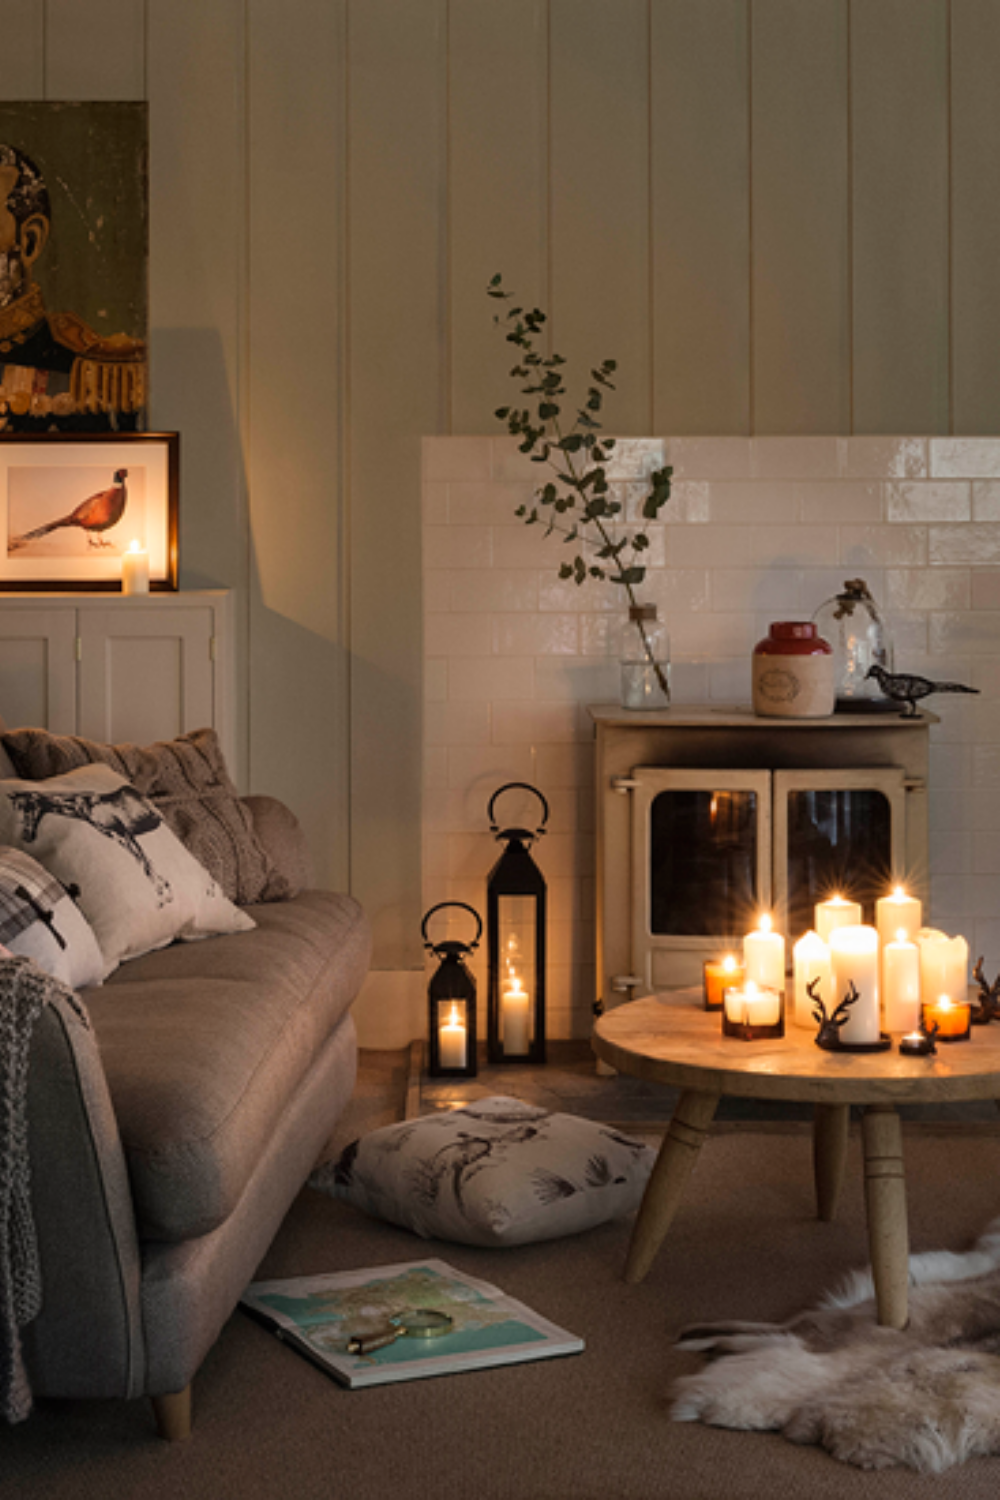
#8: Play with Lighting

Want your home to instantly look more expensive? Turn out the fluorescent overhead lighting and experiment with soft lamplight, wall sconces, and flameless candles.

Strategically placed soft lighting can be used to elegantly highlight certain feature areas (like your fireplace or fancy art wall) while taking the focus away from less charming corners.
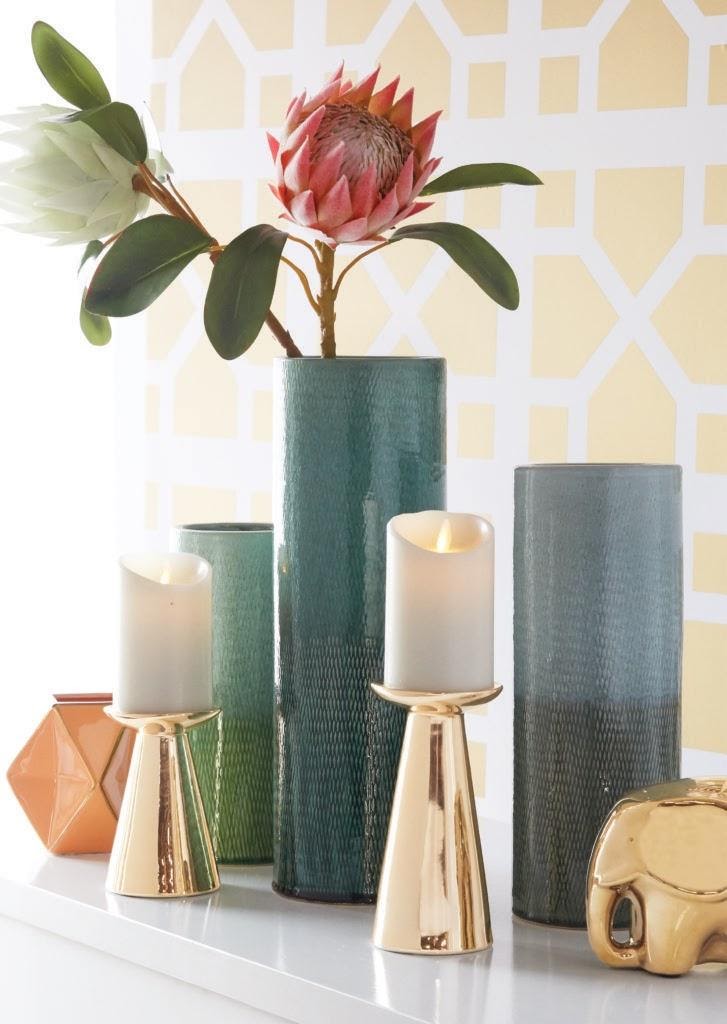
#9: Go for the Gold

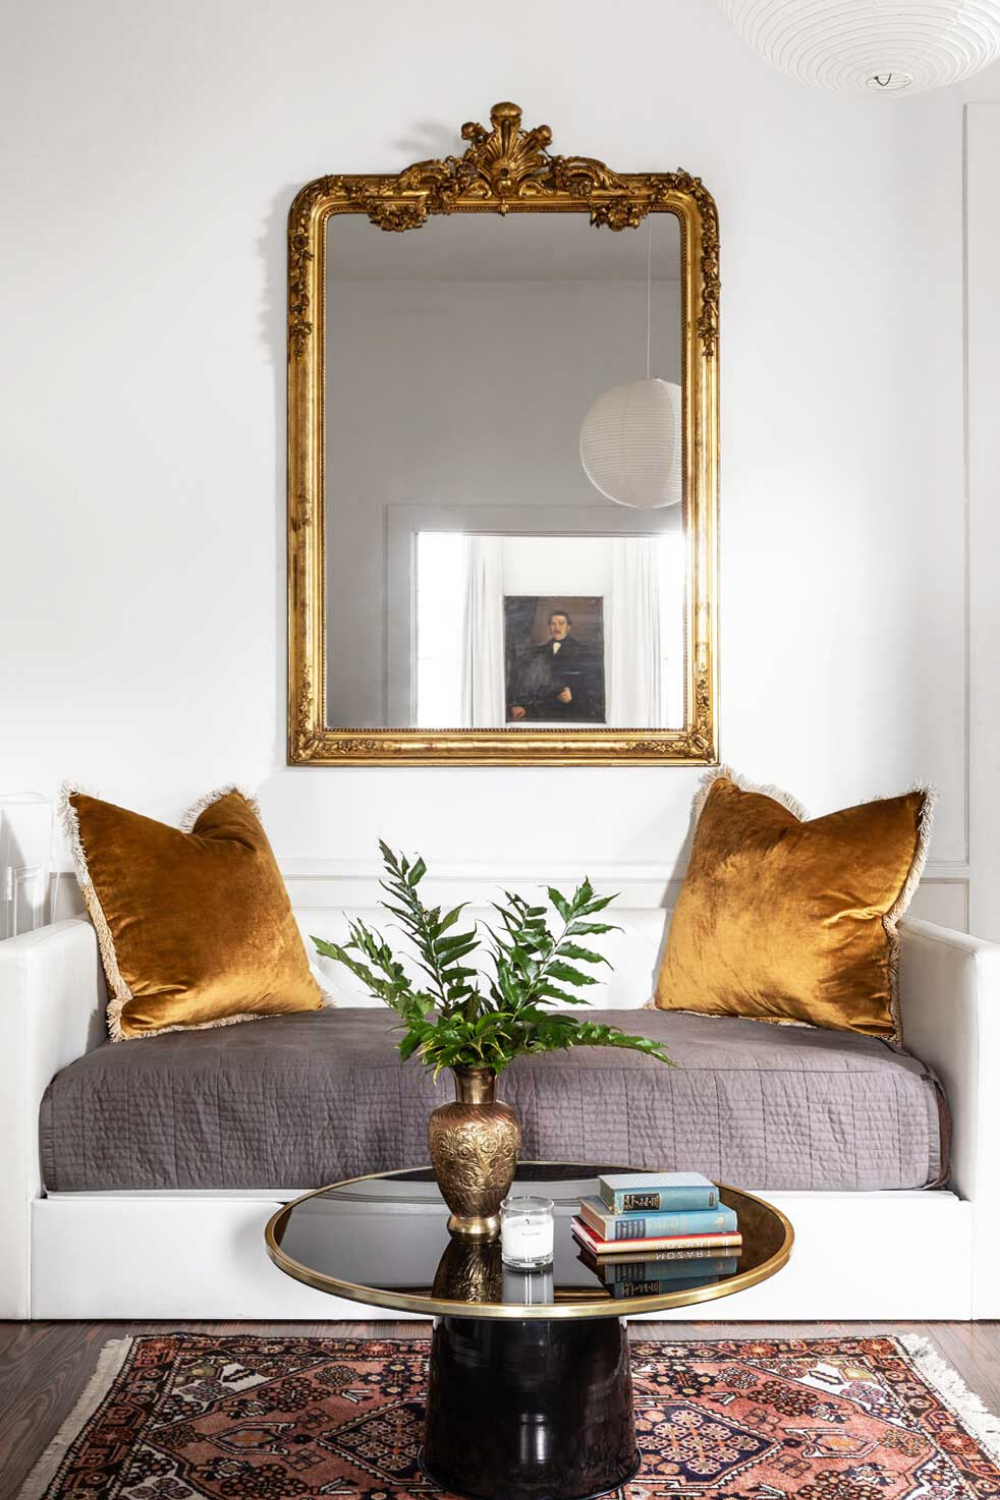
There’s no easier way to make your home look expensive than adding a few gold accessories! From picture and mirror frames to accent pillows and vases, throwing a little gold into your decor will give your house a million-dollar look. Just make sure you don’t go overboard and step into “gaudy territory!”

DIY Budget-Friendly Tip: There’s no need to go out and purchase new items to bring in those gold accents, simply buy a $5 can of gold spray paint and have fun turning vases, candle holders, and picture/mirror frames into expensive-looking accents!

#10: Update, Don’t Replace

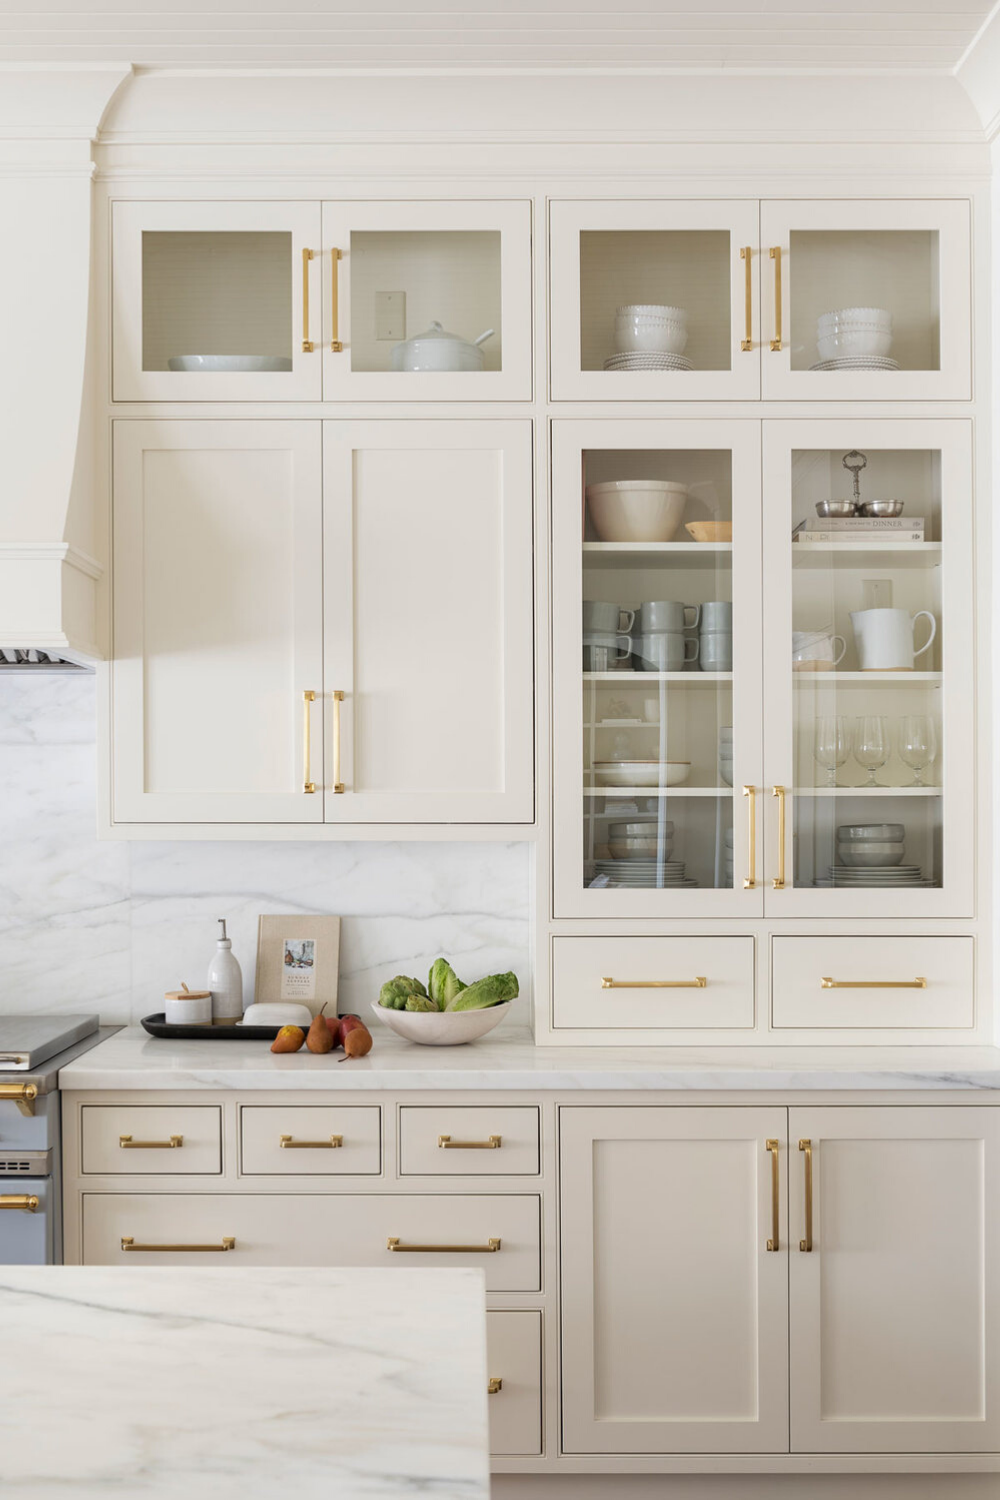
Just because your budget won’t allow you to replace outdated cabinets or upgrade cheap fixtures doesn’t mean you can’t make them look amazing! A fresh coat of paint goes a long way (and is relatively inexpensive) in transforming cheap, outdated items into expensive-looking ones.

DIY Budget-Friendly Tip: Buy a gallon or two of paint (we think light neutrals like white, cream, or gray look the fanciest), and have fun transforming your kitchen or bathroom cabinets into modern, expensive-looking showpieces.

And if the cabinet handles and hardware look out of place after that fresh paint job, grab a can of metallic spray paint (gold, black, silver, etc) and paint those as well!

Start Today

We hope you found these 10 ways to make your home look expensive on a budget-helpful! And remember, when it comes to updating your home, start small. Pick one room (or even a small corner) and try one of these 10 budget-friendly tips to instantly make your home look more expensive today!

How to Create a Pet-Friendly Home

Getting a pet for the first time but don’t know how to pet-proof your house? Or maybe you’re tired of the constant messes and want to know how to create a lovely, pet-friendly home where both you and your pet feel comfortable? You’ve come to the right place!

Today we’re sharing our top styling tips and ideas to help you create a home that is equal parts beautiful, clean, and pet-friendly!

Get Pet-Friendly Furniture

One of the biggest problems pet owners run into is how to keep pets off the furniture, and when you give up trying (c’mon, it’s inevitable that they’ll win!) how to keep your furniture clean, fresh-looking, and hair-free.

The answer? Buy pet-friendly furniture! Go for quality fabrics and textiles that won’t easily scratch, collect hair, or get stained. Some good options for couch and chair materials include leather, synthetic micro-fibers, and canvas.

Also, pay attention to the non-cloth parts of your furniture, like couch legs and coffee tables. These look a lot like chew toys for many dogs, so if your pet is a chewer, you’ll want to steer away from wicker, wood, and rattan, opting instead for metal or chrome.

Coordinate Colors


Speaking of furniture, it’s also a great idea to match your upholstered couch and chair colors to your pet’s fur. Sounds crazy? Trust us, it’s not. The last thing you want is your pet’s fur to be front and center for all to see.

So next time you’re tempted to buy that black velvet couch (even though you have a white, long-haired kitty), do yourself a favor and don’t get it. Instead, get the white or cream one, you’ll thank us later.

Invest in Hard Surface Floors


If possible, choose hard surface floors for your home. Pet’s paws and fur deposit mud (and other unmentionables!) on the floor, so if you’re trying to design a pet-friendly home, it’s best to go for hard surface floors for easier cleanup and to reduce potential carpet odors.

Pet-Friendly Pro Tip: Not all hard floors are created equal when it comes to being pet-friendly. Hardwood floors scratch and dent easily and puddles (from water and potential accidents) have to be cleaned up right away to avoid stains, so tile or laminate flooring is usually a better choice.

Don’t Splurge on Rugs


While you may be tempted to cover your hard surface floors with luxurious, expensive rugs, keep in mind they will most likely take on an odor or get stained, chewed up, and worn down over time, so pick rugs you won’t mind replacing in a year or so.

Choose Decorations Carefully

Pets don’t know what “careful” means, and they don’t know how to tiptoe around the house! They’ll wag their tails and knock over knick-knacks or climb up the furniture and get into things they shouldn’t. It’s inevitable. Which means you (and your house) have to be prepared!

Decorate with non-breakables and inexpensive items when possible, and make sure to keep your prized items out of reach of wagging tails and climbing paws.

Put out the Flames


Burning candles can pose a huge threat to your pets—from emitting dangerous toxins into the air they breathe to the possibility of them accidentally knocking the candle over and causing a fire—it’s never a good idea to burn candles if you have pets.

But if you love candles and don’t want to give them up (we understand, candles are the best!) simply switch out your regular candles with pet-safe, flameless ones like these from our shop.

Beware of Plants

Love decorating with live plants? We do too! But when you have pets, it’s extremely important to do your research first since many common houseplants are actually toxic to animals (and as most pet owners will tell you, pets like to chew on plants).

A few house plants safe for cats and dogs include spider plants, areca palm, Calathea (aka zebra plant), and the Boston fern.

Create a Pet Zone

If you don’t fancy the idea of puddles of water, scattered food, or kitty litter collecting in your kitchen or living space (who does?), consider creating a pet zone. Maybe it’s in your laundry or mudroom, in the basement, or near the entryway.

Wherever you decide to put the “pet zone,” make sure your pet knows it’s his special spot where he gets his food and water, where the litter box goes (if you have a cat), and where he lays in his bed. This helps keep the pet mess away from the rest of the house and makes cleaning easier!

How to Create a Pet-Friendly Home

So there you have it, our top tips on how to create a pet-friendly home! If you’ve been daunted by the thought of bringing home a pet, or overwhelmed by your current pet-home situation, start by integrating just one of these tips today into your house and you’ll be on your way to creating a pet-friendly home!

10 Ways to Make Your Home More Relaxing

Feeling stressed at home? We understand. For most of us in 2020, our homes have become everything from offices and gyms to schools and full-time daycares…hardly relaxing! But believe it or not, it’s still possible for your home to be a place of refuge and peace.

Today we’re sharing with you 10 ways to make your home more relaxing. From decorating tips to a few daily habits, you’ll be on your way to having the peaceful home you’ve always dreamed of.

Embrace Natural Light

This one is first on the list because it’s so easy and doesn’t require you to buy, rearrange, or really do anything besides open up your blinds! Letting in natural light can instantly brighten not only a room, but also your mood.

Every morning this week, open up your blinds or curtains first thing. And if any of your windows are covered by a bookcase or thick curtains, consider moving things around to optimize the natural lighting. See what it does for your home and mood!

Bring Nature Inside

Source: BHG

There’s a reason so many of us go outside to relax and recharge after a long week. From visiting local parks or botanical gardens to hiking in a forest, nature’s calming and restorative qualities relieve stress and refuel our minds.

So why not bring a little of that into your home? Buy a potted plant or fresh flowers for even just one room in your house (maybe your workspace?) to infuse it with a calming, grounded energy.

If you’re not so much the gardener type, try hard-to-kill plants like snake plants and parlor palms.

Consider Color

Do the colors in your home make you feel calm and relaxed? Studies show colors can have an effect on our mood, with certain colors evoking happiness or calm, and others inciting sadness or stress.

If you want the colors in your home to make you feel more relaxed and at peace, rely on neutral, warm tones like creams, while also incorporating colors that mimic nature like greens and browns. It’s also helpful to add a few accents like orange, red, or yellow to cheer the room.

Create an At-Home Spa

Need a place to wind down and relax after a long day? Bring the peace and relaxation of the spa into your own home by creating an at-home spa in your bathroom.

Line the back of the tub with candles (if you’re planning on getting really relaxed, use flameless ones like these!), bring in a live plant or two, play some soft music in the background, and get ready to unwind!

Fill Your Home with Art

If you’re feeling a little anxious from being stuck within the same four walls day after day, why not change them up? Studies show that looking at artwork helps lower stress levels, so decorate a wall with art that makes you feel happy.

Or better yet, use your extra time at home to finally go through all those old photos! Print some of your favorites out and cover your walls with pictures of happy memories with loved ones.

Use Mood Lighting


Lighting is such a crucial part of creating a calm, relaxing space. Think about it, how relaxed would you feel during a facial or a massage if fluorescent lights were glaring down at you? Probably not very relaxed!

If you want to feel more at peace in your home, switch off the bright lights! Get warm-toned, lower watt light bulbs and rely more on lamps and candles (we recommend these flickering flameless candles for ultimate ambiance, plus you never have to worry about blowing them out!).

Keep Things Tidy

We know. This one can be SO hard when you’re stuck at home everyday with your work, the kids, the pets, and everything else. But trust us, if you take the time and energy to tidy up even for just 10 minutes every day, you’ll see a drastic difference.

It’s hard to focus, much less relax, when you’re spending 20 minutes digging through piles just to find something because the house is such a mess. So take our advice and keep things as tidy as you can, and your home will feel much more relaxing and inviting.

Soften with Textures

Often our homes don’t feel relaxing for the simple reason that they’re not cozy enough. While we’re all about sleek and modern decor and clean and shiny spaces, every home needs an element of cozy to make it feel relaxing and homey.

Add some soft throw pillows to your couch or loveseat, toss a few cuddly blankets over your bed and chairs, and see how much more relaxing and cozy your home feels!

Create Intentional Spaces

Don’t worry! We’re not saying your whole house needs to be a phone-free zone in order to be relaxing. However, it is important to have a place where you can get away from it all and just breathe and feel at peace.

The news, work, social media, emails, family texts—it’s a never-ending entourage of stress and responsibility—unless you intentionally put it down. Designate a small spot in your home (your bed, a window seat vignette, the living room) to be a phone-free zone and don’t break the rule!

Lose the Clutter

If you’re feeling anxious or stressed in your home, it might be time to lose some of the clutter hanging around. Too much “stuff” lying around can weigh you down, so if you want to feel refreshed and relaxed in your space, grab a box and pack away anything that doesn’t bring you joy or serve a purpose.

You may want to remove everything from your countertops, coffee tables, etc., and leave them empty for a day or two, then return (some of) the items with a fresh perspective. You’ll most likely realize how much better your space looks when it’s free of “stuff.”

Start Today

So there you have it! 10 ways to make your home more relaxing. Keep in mind you don’t have to do all of them (or even three of them!) to create a peaceful home. Simply start with one.

Begin by reflecting on the kind of home you want to have, then pick one (or more) of these 10 ideas that most aligns with your interests, time, and resources, and start taking small steps today to incorporate it into your home.

Flameless Candles Decorating Ideas for Spring

Does it feel like spring yet where you live? Regardless of whether or not it does, the calendar says spring has sprung! So we’re here today to help you freshen up your home with our favorite flameless candles decorating ideas for spring! Let’s jump right in.

Simple & Chic Side Table

After the long months of winter, your house needs to feel bright and fresh, and sometimes it’s as easy as switching up your side table decor! This colorful display sings spring with its bright cylinder vases (simplicity is key here, with flowers in only one vase) and tall candle holders topped with white flameless candles.

DIY Moss Wreath

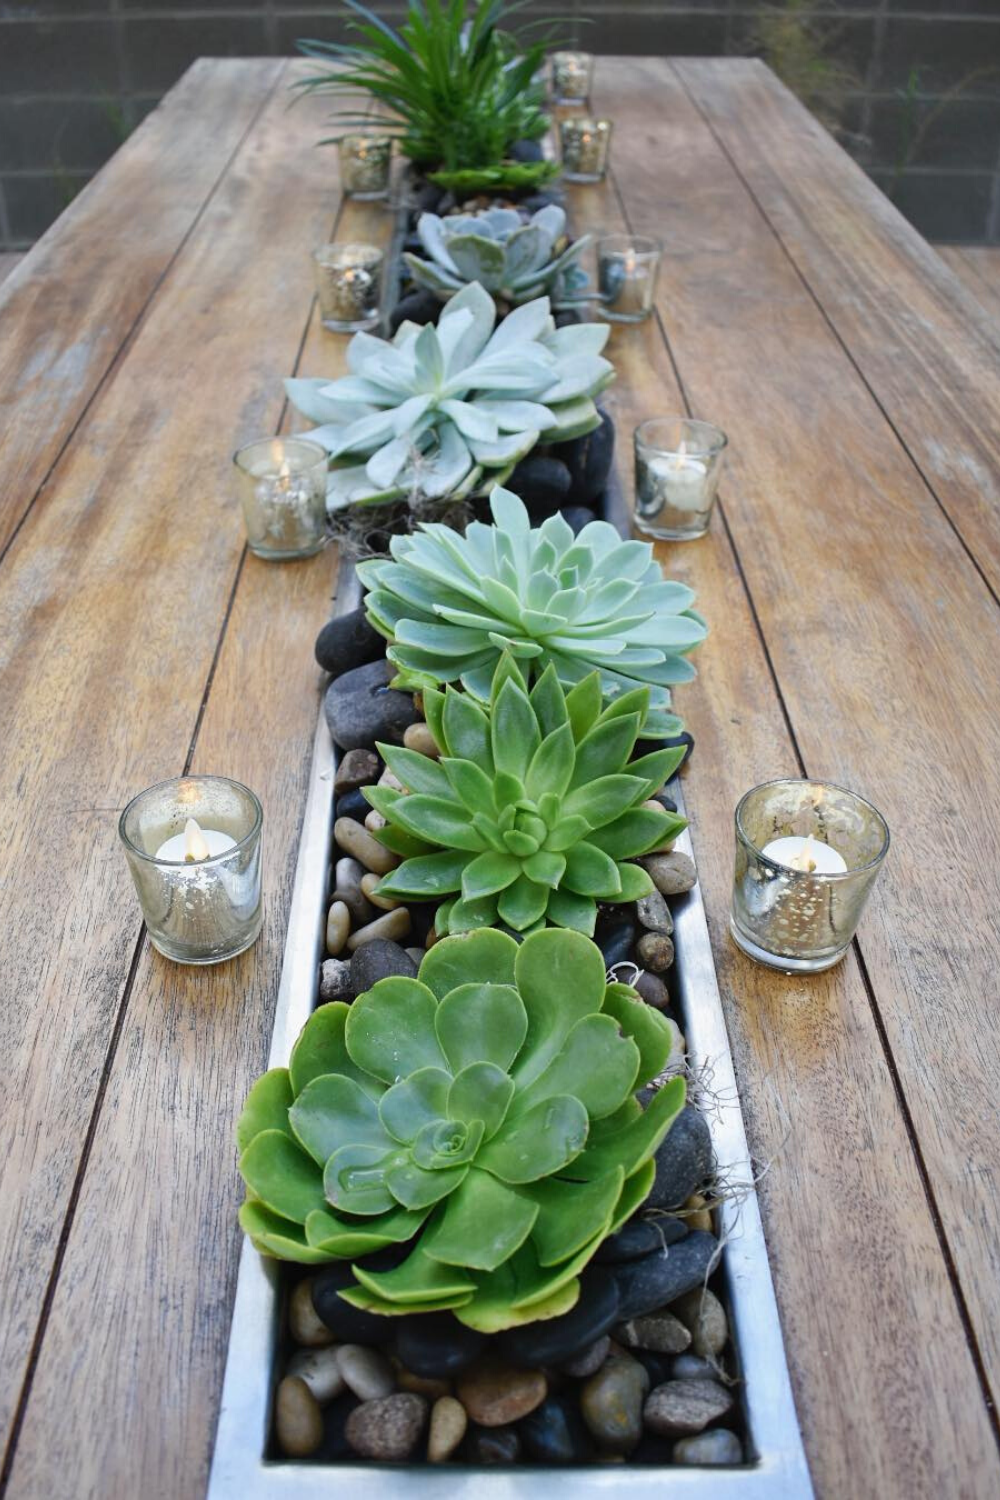
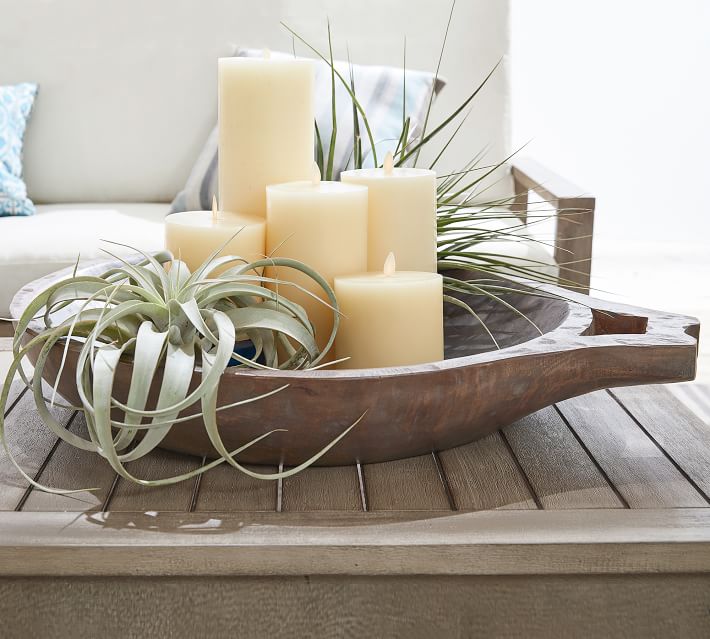
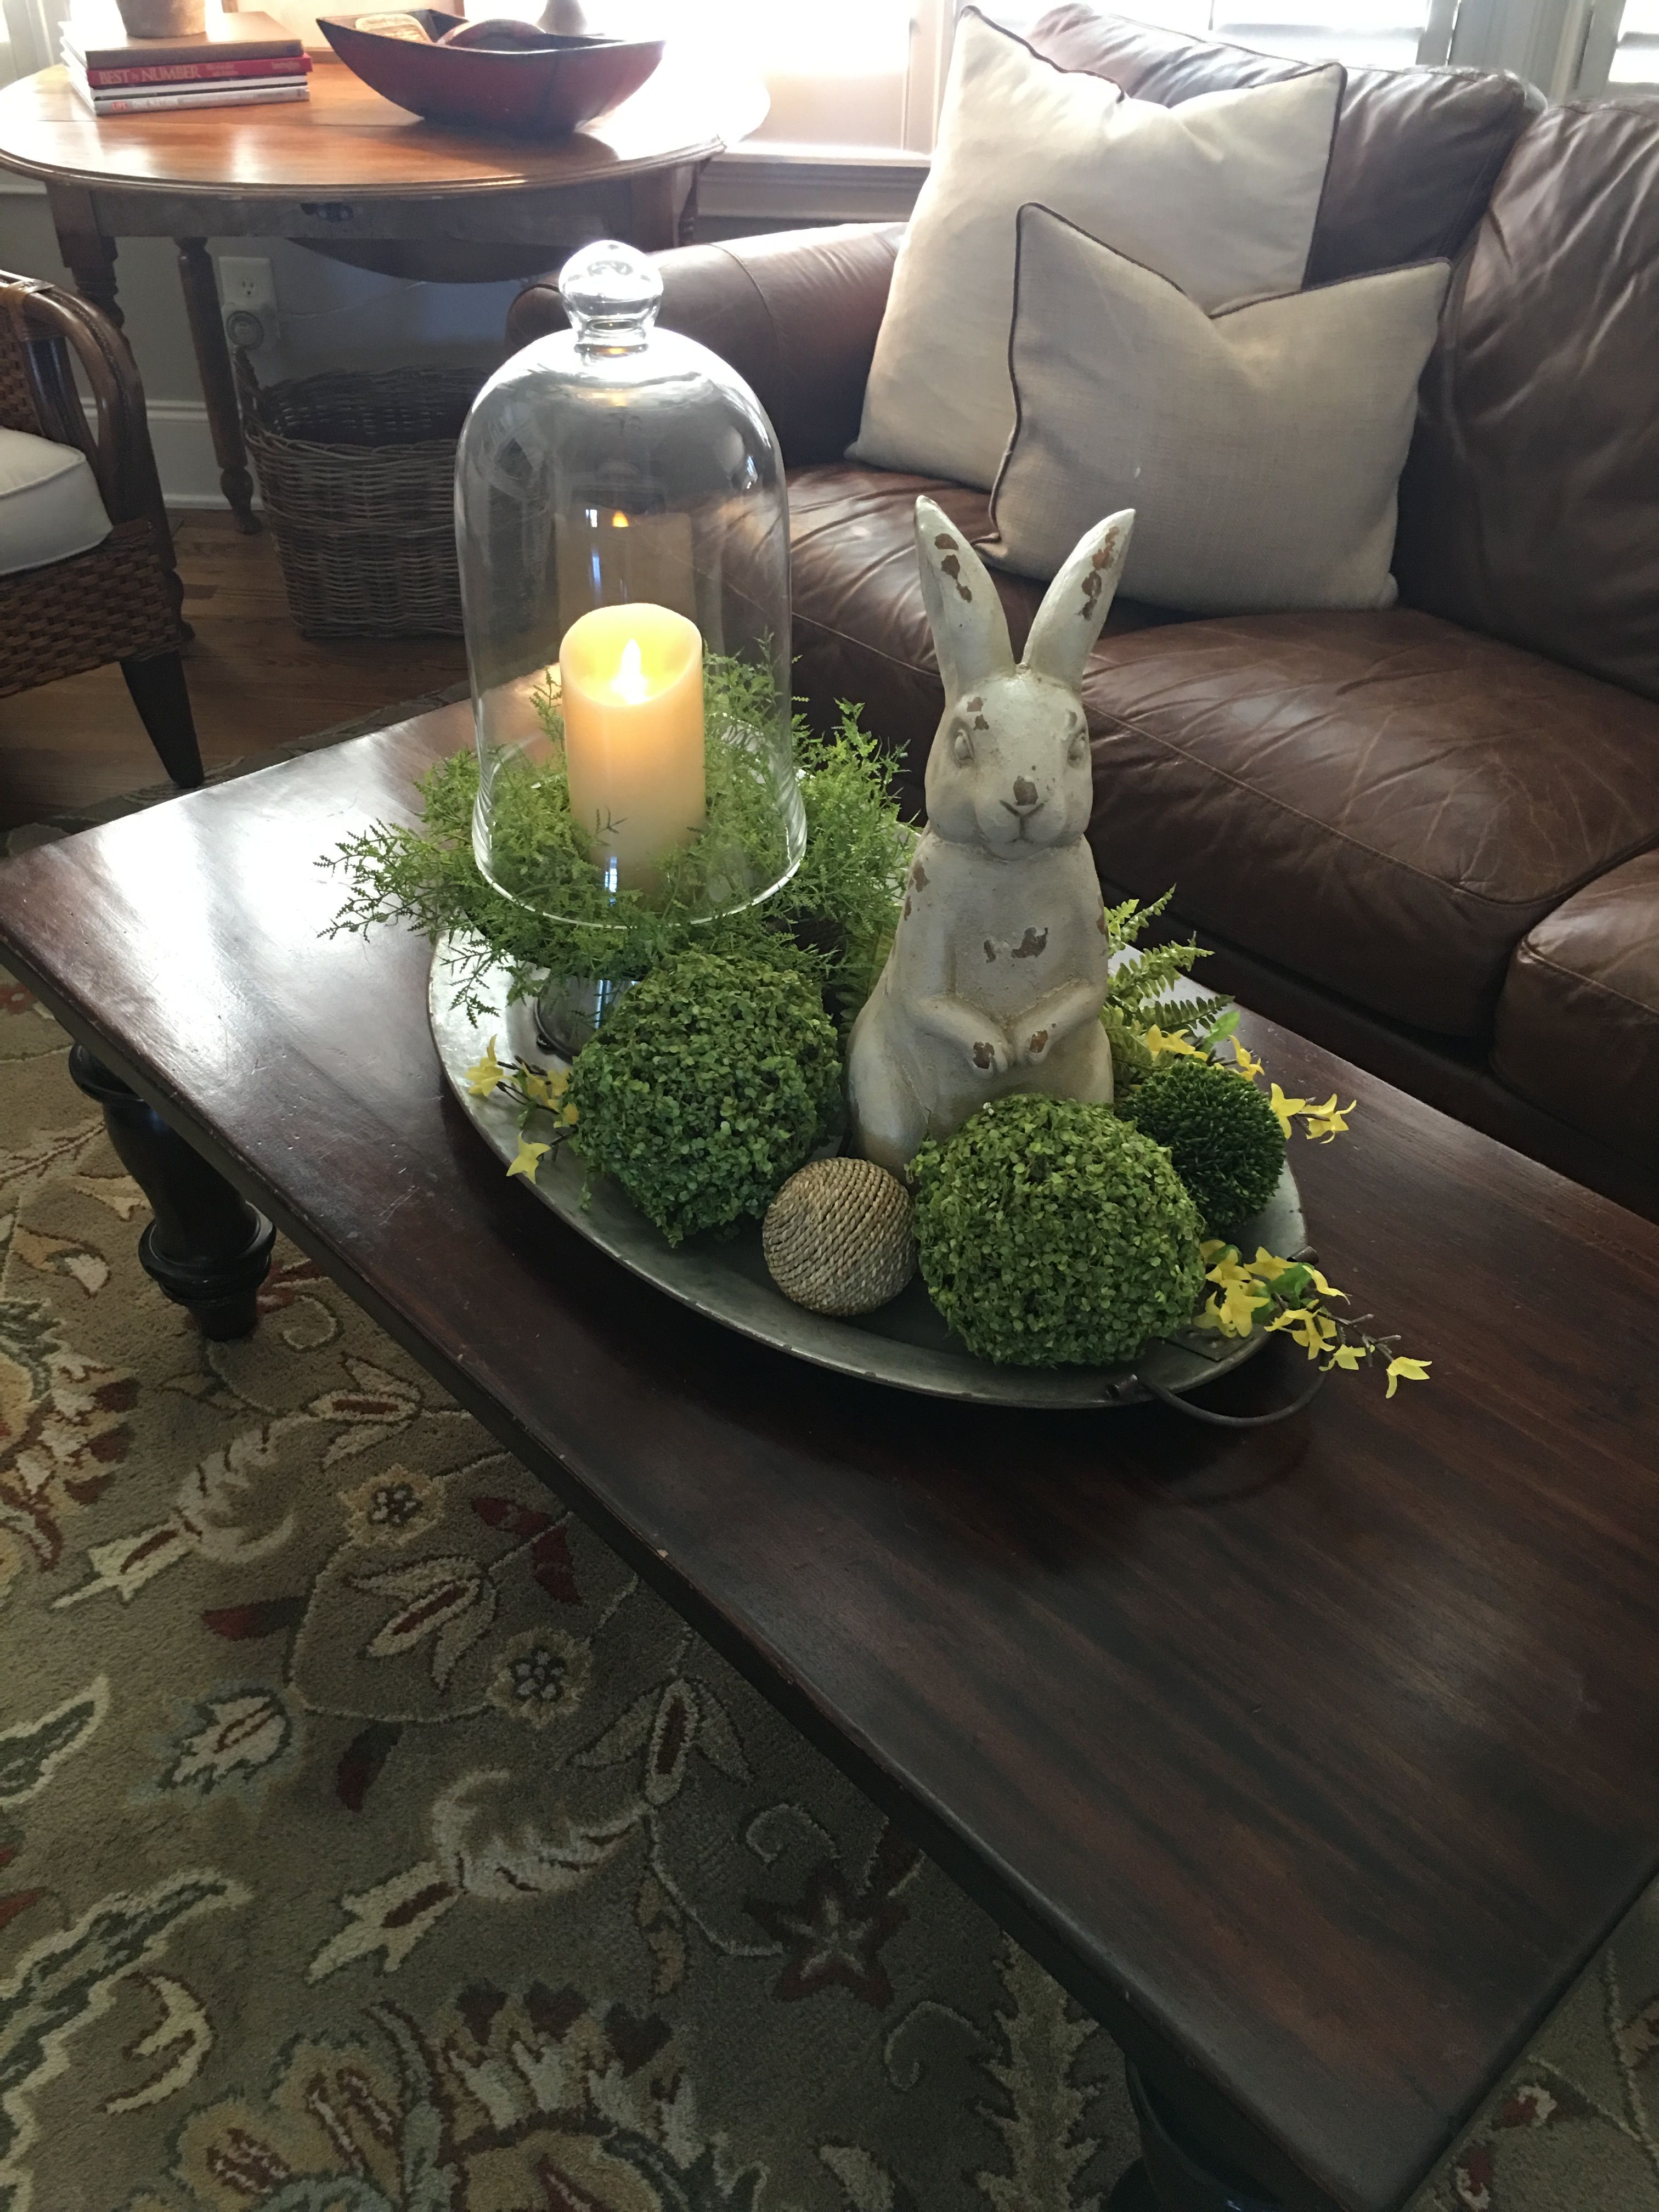
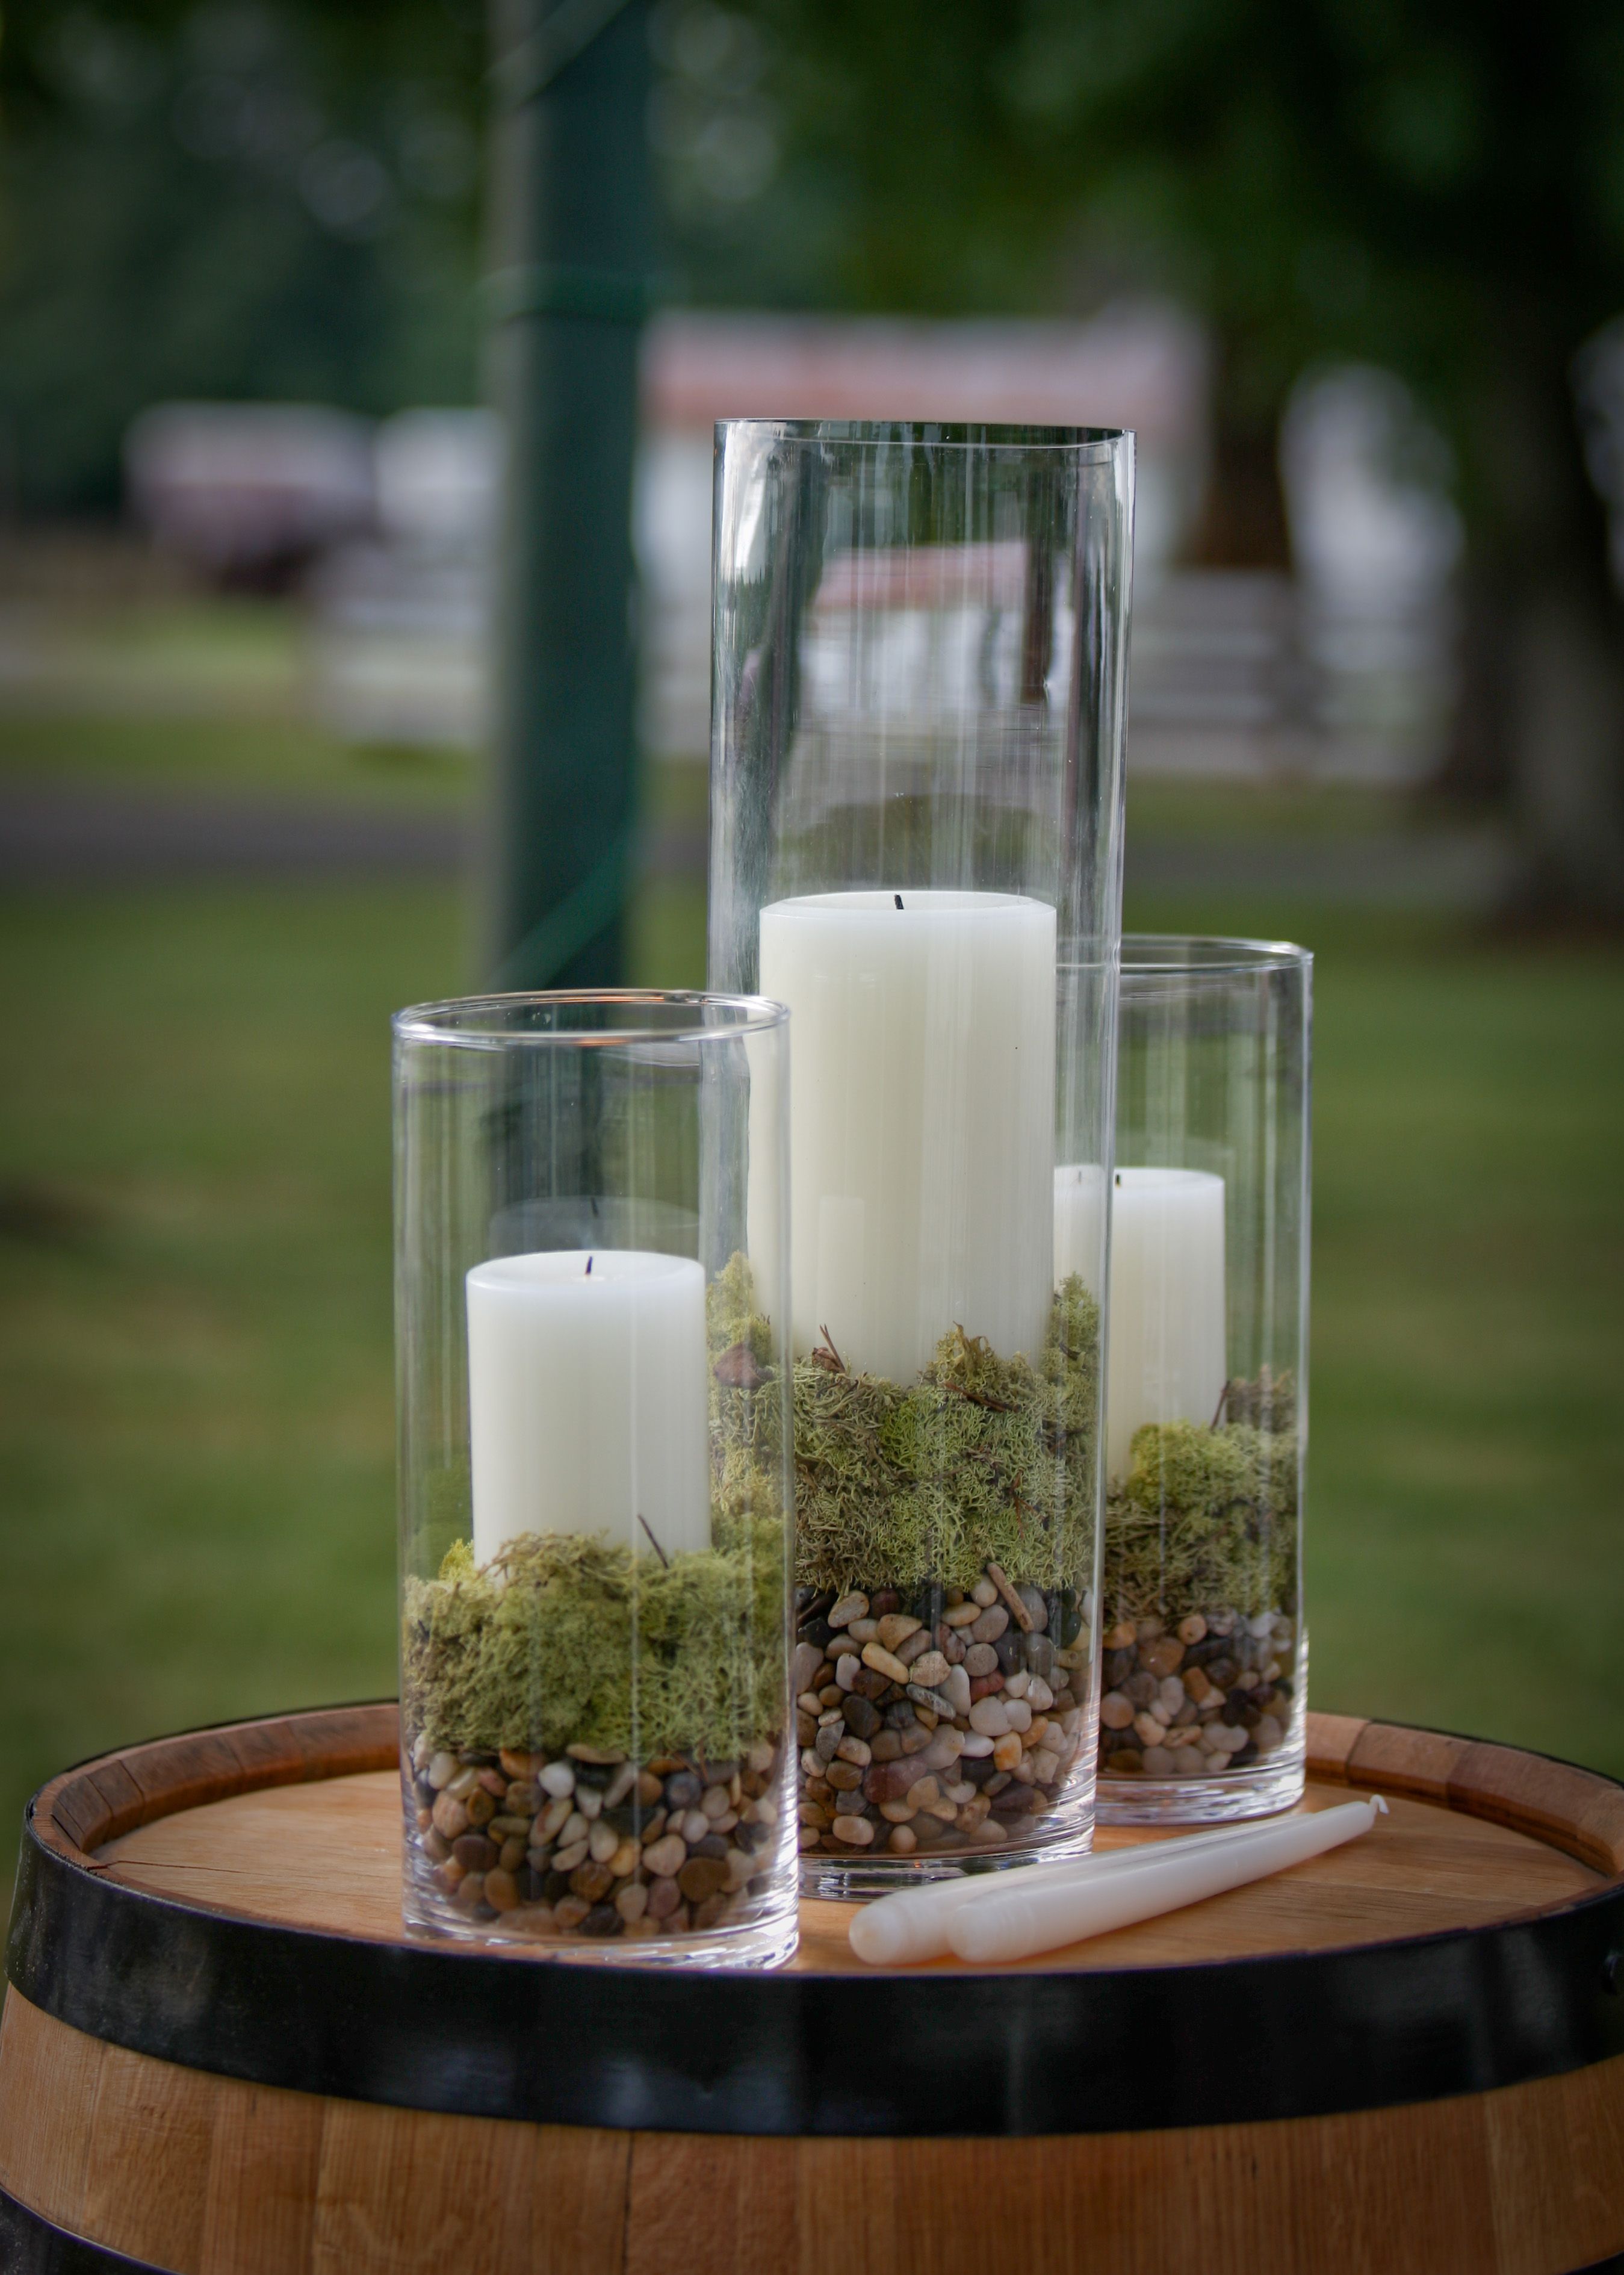
Another centerpiece idea that transforms your home into a spring haven is this DIY outdoors-inspired moss candle wreath.

Perfect for dining room tables, coffee tables, or side tables, simply cover a vine wreath with dried moss (you can purchase this at most craft or home decor stores), and then arrange three flameless candles in the center. So simple and springy!

Birdhouse Lights

If you love bird-themed spring decor (who doesn’t?), brighten up your decorative birdhouses for spring by placing flameless candles inside them. They’ll emit a soft light, creating a peaceful, springtime atmosphere in your home.

Outdoor Spring Decorating

If you’re like most of us, you can’t wait to get outside and enjoy your backyard patio come spring! But after a rough winter, your space probably needs a refresh. This flameless candles centerpiece is the perfect way to liven up your outdoor space!

Simply add an outdoor flameless candle to an old lantern or large candle holder (you probably have one collecting dust somewhere), then place it on a tray with a few more candles and you have yourself a spring centerpiece!

Succulents Centerpiece

If succulents don’t say spring, we don’t know what does! Create a springy centerpiece for your dining room table by filling a long rectangular wooden box with 4-5 white flameless candles, then fill out the arrangement with succulent inserts. Super easy and it screams spring!

Dough Bowl Decor

This repurposed dough bowl centerpiece is the perfect DIY project to get your house ready for spring. The main focus of the centerpiece is on the candles (flameless, of course, since there’s greenery involved), which brings a light and airy ambiance to any room—just what you want for spring!

The centerpiece uses air plants (they can be purchased live at most nurseries or you could use any fake greenery you have lying around the house), flameless candles, and a rustic-style
dough bowl.

Easter Table Decor

Source: OneKindDesign

Decorating your dining room table for Easter dinner? The elevated candle holders in this centerpiece give the table a simple yet elegant style that’s easy to replicate. And be sure to use flameless candles so you don’t have to worry about wax dripping during the family meal!

DIY Tip: If you have old candle holders lying around the house but don’t love them, consider spray painting them white or cream this spring for your Easter centerpiece.

Candlestick Wreaths

Source: GrandInRoad

These spring-inspired candlestick holders are a fun and easy way to freshen up your home for spring. They go great on fireplace mantels, side tables, dressers, and even for a fancy dining room table look.

If you already have the candle holders, all you’ll need to purchase are several small greenery wreaths and enough white candles to complete the look (use flameless so the wreaths don’t catch fire!).

Which one of these flameless candles decorating ideas for spring do you love? Remember, when it comes to transforming your house from winter to spring, even decorating one or two spaces can make all the difference in your house.

So pick one project (don’t forget to grab your flameless candles over at our shop!), and start decorating for spring today!

Pro Tips For Decorating With Accessories

Accessorizing is an integral part of home decor, where you bring the entire set-up together and give it a character. If you are anything like me, you are never completely happy with your home decor.

Every time I think I have nailed my home’s decor with the perfect accessories, I see something interesting at a friend’s place or even worse, the store!

And of course, I need it, irrespective of whether it matches the existing scheme of decor. In fact, in my head, I have already found a place for it!

If you are in the same boat – buy random accessories and then scramble around to fit them with the existing decor, this post is for you. I have finally come up with basic rules to help me accessorize my house without going over-board.

Identifying Home Decor Accessories

Before getting into the intricacies of accessorizing your home, let’s take a look at a few home decor accessories. This is broad segregation, but you can add anything to this list as long as you are comfortable with it.

Wall Accessories

When it comes to decorating a space, often our first thought is about the walls. While paintings and family pictures are the most common ones in this category, mirrors, decals, and floating shelves are great options too.

Photo by Bayu Syaits on Unsplash

Decorative Knick-Knacks

Think candles, ceramics, vases, or figurines. While the larger pieces of furniture need a specific layout and are pretty much permanent, these smaller knick-knacks are ideal to create layers. You can replace them anytime at your whims and fancies.

My favorites are flameless candles. They are safe, and you can pair them with any other accessory or use them by themselves.

If you think they might not give the look and feel of traditional candles, then you should check the Matchless Candle Company.

Every guest who has walked into my house has complimented me for the realistic moving flame. They have an excellent selection for every space of your home – from the bedroom to the outdoor patio.

Plants and Flowers

Be it faux or real, flowers and plants are great ways to add a touch of nature. While both add texture to your space, flowers especially can make a room cheerful and lively.

Throw Pillows, Blankets, and Rugs

Throw pillows and blankets make a space cozy and inviting. They add color and personality to a room. When coordinated with rugs, they can tie a room together.

Photo by Designecologist from Pexels

Now let’s see how we can put them together to give a pleasant look.

Layer With Color & Texture

  • Color
    Accessories are the simplest way to add color to your decor. But before you start accessorizing, keep in mind the purpose of the room.
    For bedrooms or reading areas, you want a calmer vibe that will help you relax or wind down at the end of a busy day. Busier spaces like your living room or family room can have colorful accessories that make the room vibrant and energetic.
  • Texture
    Texture works on top of the color to give your room a personality. You can use throw pillows, rugs, flowers, and plants for this purpose. And if you want to transform a neutral room, then texture is your friend.
    Texture gives you the ability to style a room according to your mood or the season. Add in bright colored pillows and rugs like yellow, orange, and bright green to make the room warm. Fur and deep pile rugs give a cozy feel.
  • Contrast
    Contrast is a great but tricky way to make a room interesting. When used in moderation, it can brighten up space, but over-doing it can give a chaotic feel.

Less Is Often More

Have you ever walked into a room and felt overwhelmed with the decor? It is probably because there are too many things giving it a busy feel.

Often we buy random pieces and want to display each one. This is when it starts getting cluttered. Instead of telling their story, every accessory is now competing with it’s ‘peers’ to get the audience’s attention.

Try and embrace the thought of ‘less is more.’ Select a few accessories and arrange them, leaving some blank spaces. This makes the space elegant.

One tip that I have found helpful here is to batch my accessories. This means you can create different sets and display them inter-changeably every few months.

Photo by Skitterphoto from Pexels

Balance Asymmetrically

Asymmetric arrangements give a casual and informal vibe. They strike a balance by managing visual weights through proportions, colors, and textures. Since they do not follow the rules of making everything look even, they make the space appealing.

You can try this style by mixing and matching accessories of different proportions and textures in groups of threes or fives.

For example, a console table at the entrance of your house can have 3 glass vases of different shapes or 5 candles of varying colors or a combination of both.

Photo by Tom Swinnen from Pexels

Accessories can give any room a facelift. All you need to do is:

  • Think of the purpose of the room and use color and texture to provide layers to the decor.
  • Not go overboard with too many accessories.
  • Balance asymmetrically to make the space attractive.

If all these sound daunting, remember you don’t have to start everything at once. You can begin by rearranging the accessories you already have. How about reducing the clutter? Start with one corner and slowly move to other parts. In no time, your house will be a home-decor haven.

How To Style Your Fireplace Mantel for Spring

The fireplace is often considered a fixture of fall and winter decor – but it also can be styled to perfectly accentuate your spring style, too. Decorating year-round can be challenging, but it’s a great way to showcase your personal style and celebrate the seasons.

Here are some tips to help you style your fireplace mantel for spring.

Add Color

If you spent all winter with a dull white mantel, you might be ready for a new vibe come springtime. Adding a pop of color is not only a great way to warm up the room, but it can also make the room feel more welcoming, too.

Spring is the tie for pastels. Save the dark, earthy tones for summer and fall and incorporate pale pinks, purples, yellows, and greens into your decor. You can choose any color that works with your existing design, but make sure it’s muted and calming.

Varying Heights

Variety is the spice of life, and that’s especially true when it comes to your springtime mantel. You should try to incorporate a variety of shapes, textures, and sizes to create visual interest in your living space.

The easiest way to do this without losing your mind is to include items of varying heights. If you use vases of greenery to make a statement, don’t use identical vases.

You can stick to a consistent color scheme, but choose ones of different heights to draw the eye to each unique element of the mantel.

If you’re looking for a functional, simple way to pull off this effect, you might want to consider adding a few flameless candles.

Matchless candles like these can be styled to suit every space and season, so you’ll never have to worry about them seeming out of place. Plus, they’ll cast a delicate, warm glow around the room once the sun sets before dinner on those shorter days of early spring.

Make a Statement

If you want to draw attention to your fireplace mantel, you’ve got to make a statement with a large, attention-grabbing focal point.

You don’t need to waste time on gaudy, loud statements, either. Consider artwork that complements the rest of your decor, or even mirrors or delicate wreaths.

You might also want to add items like birds’ eggs, classic white dishes, chalkboards, or vases. These are not only attention-grabbing without being overly demonstrative, but they offer the very best imagery of spring.

Classic Symmetry or Balanced Asymmetry

Your fireplace mantel can be symmetrical, or it can be asymmetrical – but whichever option you choose, you need to pick a horse and run with it.

Classic symmetry is a great choice for a room that already features bold colors and striking displays of artwork, furniture, or other features.

You don’t want to overwhelm your guests with a mantel that seems chaotic in its asymmetry. Keeping things simple and classic – and balanced on both sides – is a great way to keep things calm.

However, if you really want to make a statement with your spring fireplace, balanced asymmetry is the way to go. Now, that doesn’t mean that your mantel should become the dumping ground for all your clutter.

Instead, you should think carefully about what items you would most like to include on your mantel. Consider the ways in which you can strategically place them so that their asymmetry looks casually and effortlessly arranged – and not accidental and disorganized.

Add Greenery

If you really want to bring the best of spring into your living space, you should add some greenery. Look out your window. Is the grass turning green? Are the flowers emerging from the soil? Are those first buds popping out of the trees?

Spring represents new life and growth, and there’s no better way to reflect the best parts of the season than to use flowers, greenery, and other plants in the styling of your spring fireplace mantel.

You don’t need to replace live plants every week, either. You can easily use artificial greenery to achieve the same effect. You will find many artificial plants that look deceptively lifelike!

Don’t Delay – Start Planning Your Spring Mantel Now

Ready to style your fireplace mantel for spring? If so, you’ve got to consider the tips we’ve outlined for you in this article. You don’t have to tackle everything at once, either. In fact, designing a new space can be overwhelming if you try to incorporate a million ideas at once.

Instead, start small. Add a flameless candle here or there for a dramatic- yet subtle effect – or play with pale pastels to find the style that best matches your personality and space.

You’ll love the look of your stylish new space as you enjoy Easter brunch with your family in front of the flickering flames!

5 Easy Ways To Spruce Up Any Room

Your home is a haven. It’s a place where you entertain, nurture friends and family, and live your daily life. Our homes are also a place where we feel comfortable and relax, but sometimes we want to enhance that environment just a bit.

There are several ways to make a house – or apartment – a home by making a few simple changes. Here are a few ideas on how to easily upgrade any room in your house.

Remove Unnecessary Clutter

Nothing adds stress to a house as clutter does. It is soothing to take a mental inventory of your home and know that every item has a purpose and is in the correct place. Sometimes that isn’t possible as we bring things home from school or collect items from birthdays and holiday celebrations.

One key to having unity in your home is to clear the clutter. A rule of thumb that works for managing a home is to have a “one in, one out” rule. Buy a new shirt? Get rid of one. Have a new favorite mug? Remove an old one from your collection.

Once a month, walk through your home and take inventory. Remove the unnecessary items you’ve gathered and either have a yard sale or donate the things to a worthy cause.

Add Some Texture

Most rooms are a blank slate – actually, a dull square with a few windows and doors. You move in and add some furniture for functionality, but it doesn’t stop there! Don’t forget to pepper your space with items that add texture, color, and depth.

Accomplishing this isn’t too tricky. Soft surfaces such as rugs, blankets, and pillows can freshen up a space, but don’t be afraid to add in other interesting textures. Architectural elements, such as geometric vases and unique light fixtures, will also add a bit of visual interest to your room.

Utilize Mirrors to Give Depth

Beautifully designed spaces almost always include mirrors. Why? Part of the reason is that they reflect and elongate the room. If you are taking the time to create a space, having a piece that does double duty visually isn’t a bad thing.

Another bonus is that mirrors serve to make small spaces appear larger. Their reflective surfaces also add depth and draw in the viewer.

Hang a mirror as the focal point to a room or have it reflect a window. Also, don’t be afraid to let the mirror itself serve as an art piece! We often think of mirrors as being rectangular or square, but using a round, oval, or geometrically shaped mirror can add even more interest to a wall.

Gallery walls are en vogue, and you can collect a few smaller mirrors and gather them together on one wall to pack a visual punch.

Don’t Be Afraid to Experiment

It’s your home, so the sky’s the limit – ok, well the roof. Essentially, it’s your space, so you make the rules. Test out a bold wall color. Showcase a collection of vintage tins. Hang that incredible art piece that only you love. And why not? Your home is a place for you to enjoy.

Another fabulous way to experiment is with candles, and to ease your mind, incorporate flameless ones that mimic the flicker of a traditional candle. The light from candles creates a soft, welcoming glow to a home.

Utilize them on mantles, in vases, to line your staircase, and even on your porch to create an unparalleled ambiance.

Add Greenery to Your Scenery

An inexpensive way to add softness and life – literally – to your space is to add plants. You can utilize a few high-quality silks to mimic live flowers, but you can also invest in a few hearty plants that require minimal care.

English ivy, spider plants, and pothos are not only easy to care for, but they will serve to improve air quality. Plus, there is an understated element of ease that greenery offers by bringing the outdoors inside.

Bonus: plants also add a ton of texture so that you can hit two of our suggested upgrades in one step!

Are you ready for upgrades?

Whether you choose to add a soft, safe glow from flameless candles or decide to pep up your space by adding plants and texture, doing something different to your home can be invigorating!

Also, don’t let a list overwhelm you. It’s ok to start small and accomplish one or two things at a time. Do whatever makes you comfortable because that is what being home is all about.

Tips For Decorating Your Kitchen Island

Taking Your Kitchen Island From Bland to Glam

We all know that the kitchen is the epicenter of any home, and for me, the kitchen island is the soul. It’s like the popular kid in school – everyone gravitates towards it. It’s the go-to place in my house. It’s where my kids will sit to eat their snack and do their homework. It’s where I’ll hang out with a glass of wine with my husband or friends and catch up on our lives. After spending months designing the kitchen to be just how I wanted it, my focus then shifted to the most important thing that was left – ways to accessorize the island. With so many options, but never enough space, I’ve come up with my top 5 “must-haves” in kitchen island decor ideas.

5 Items That Will Spruce Up Your Kitchen Island

The only thing worse than a bare island is an overly messy one. My kitchen island is a coveted space. I don’t like clutter so what I do have on it needs to add value, and by that, I mean it needs to look great or serve a purpose (preferably both)

#1: Fruit is Nature’s Candy

First up on my list is the simple fruit bowl. No kitchen island is complete without one. This checks the box for looking gorgeous and being useful. I know that when the fruit is given pride of place in my kitchen, we tend to snack on it more and make healthier choices (hence why the cookie jar is at the back of the pantry. The theory for that being out of sight, out of mind).

What kind of bowl should you look for? Fruit lasts longer if the gasses have room to circulate. With that in mind, I’ve found the perfect bowl that’ll keep the fruit fresh but doesn’t compromise on style. Designed by Marco Trimarchi, La Stanza Bowl dello Scirocco by Alessi comes in white, black and stainless steel, and makes a great centerpiece for your kitchen island.

#2: Setting The Ambiance with Flameless Candles


What I love about candles is that their very presence brings me a sense of calm. I associate candles with romance, and tranquility, and peace, and quiet. So even though the kids and dogs running through my house at any given moment represent none of those things, it’s like the Pavlov effect. The very sight of a candle transports me internally to a better place.

Our Flameless Candles from the Matchless Candle Co. provide the same soothing glow of a real candle but without the mess or safety concerns, and don’t need constant replacing! Made from real wax and individually hand-poured, they have the look and feel of a traditional candle. The technology used to create the flame effect on their range of Moving Flame candles is so realistic that most of my guests don’t realize the flame isn’t real. It’s the perfect addition to my list of kitchen island decor ideas.

#3: Fun-filled Conversation Starters

I think the kitchen is where some of the best conversations take place. Anyone who has teenagers, however, knows that having a conversation can be like pulling teeth. So finding new and engaging things to talk about can help keep the conversation flowing. We have a lot of fun with these Table Topics conversation starters and the brightly-colored boxes look cute piled up at the end of my island.

Each box comes with 135 questions that range from silly to thought-provoking. While initially aimed at parents and young children, there’s now a box for different groups, including family, teens, girl’s night out, couples, dinner parties, and even DIY Therapy. It’s caused many a hilarious conversation in our house!

#4: The Fresh Flower Alternatives

There’s nothing better than fresh flowers, and I love the idea of having a stylish vase filled with my favorite flowers of the season on my island to brighten up my morning. But that can be pretty high maintenance and get really expensive.  They’re low enough to not cut the eyeline but make a stylish tabletop focal point. If you’re feeling crafty, you can have fun filling them with whatever you like. My favorites are plants or candles.

#5: Stunning Low Hanging Ceiling Lamps

I am in love with the look of these, modern Rona Nordic hanging lamps. They will illuminate all your new gorgeous accessories while looking simply stunning. You can mix and match the three different styles or go for a uniformed look.

Crafted from eco-friendly glass stone, they’re the statement piece that every kitchen needs and will exponentially raise the level of sophistication of your kitchen.

Coffee Table Styling Tips and Ideas

A big confession here. I didn’t discover flameless candles until my dog Bonnie’s tail caught on fire. She was simply walking by me when she turned to check out a toy on the floor. Her big beautiful plume of a tail then swept a burning candle off my coffee table. The falling candle spilled hot wax on my carpet and sofa, and ouch — my foot! After putting out Bonnie’s tail fire and making sure she was okay, and that my burn was superficial, I broke down in tears.

I don’t know what upset me more — the near disaster of an apartment fire, wax splatters on everything, or my terrifying decision to get rid of all my candles. After I told my friend Sara what happened, she came over with a gift bag of flameless candles. I haven’t bought another flame-burning candle since, and that was a year ago.

Why Use Flameless Candles?

Flameless candles? I know. I used to think they just weren’t close enough to the real thing. But when Sara arranged half a dozen candles on my coffee table and turned them all on with the press of a remote’s button, I stopped protesting. Wow. She turned off my living room lights and stepped back — I couldn’t tell the candles were flameless.. The lights flickered like a real flame. There was no heat, no way these were going to catch Bonnie’s tail on fire, and there was no melting wax to spill. There were no plumes of sooty smoke when she switched them off. I could immediately put them in a drawer or leave them out.

Best of all, she explained, I didn’t have to keep buying more candles. These last forever because they don’t burn down. You know how the most beautiful (and expensive) candles can look when they’ve burned down? They get covered in soot. One side burns down more than the other and wax pours out and puddles on your table, or the candle holder. They collect dust you can’t wash off. They go from fabulous mood-setting pieces to ugly melted things you don’t want to leave out on your coffee table.

Flameless candles don’t look ugly. You can wipe them down or carefully rinse them off with water. You don’t have to keep replacing them. Flameless candles use LED lights, so all you have to do is replace batteries every few weeks or so. I could fall asleep without worrying about a fire starting from a candle I left burning. Okay. I was sold.

Huge Selection — Great Decorating Possibilities

After I got over my swooning over the little lights, I got picky. These were great, but they were too plain for my taste. I might put a couple in my bathroom, but I wanted something more “lit.” The whole idea of candles, after all, was to rock my coffee table.

I found this awesome, Matchless Eucalyptus Wreath Lantern on HSN.

[SOURCE: www.hsn.com]

I realized that with flameless candles, I could decorate more. I wouldn’t have to worry about hot wax setting pine cones or pine branches on fire. The decorating possibilities quadrupled. Sure, I use other things to decorate my coffee table, but flameless candles just made my must-have item list. I found candles I could decorate with my favorite quotes, or a message to give to friends. This not only made them more special but being flameless meant they’d last longer.

Other Great Options for Flameless Candles
I realized that I could use my Mercury glass candle holders without worrying about the heat and soot of the candles ruining them. So, I got serious about coming up with other candle holder options.

[SOURCE: zgallerie.com]

I realized I could use any holder, even paper or flammables, to create the mood and look I wanted. I could put more stuff on my coffee table. I could put bowls of popcorn, two full dinner plates, wine glasses, books, my laptop, or whatever. When the fear of starting a fire is gone, and the worst that can happen is you knock the candle off and pick it back up — your decorating possibilities are endless. You can live a normal life with these candles.

Crafty and Creative? Why Not?

I love being crafty and creative — who doesn’t? With flameless candles, I could decorate them, tie ribbons around them, and with a little hot glue and imagination, I could seasonalize them or make them unique for any occasion from football to romance. Nice.

In a world where Marie Kondo and minimizing your stuff matters, these flameless candles do more than dress up a coffee table. They keep clutter to a minimum. Flameless candles are great on coffee tables, but I figured out I could throw them in my purse and take them with me to the library to create a softer, more chill vibe in my cubicle. I put some in my car — for the times I had those long, heart-to-heart talks with friends and wanted something different than the glare of the interior car lights. I took them camping because I love how they light up the inside of a tent without being a fire hazard.

Flameless Candles are Safe for Pets

I thought the only danger wax or soy-based regular candles posed to my dog Bonnie was fire. Wrong. I learned that some scented candles, candles with essential oils, and other fragrances could make your pet deathly ill, or even kill them. Not just that, depending on the smell of your scented candle, your pet might try eating or chewing on them! That can lead to an upset stomach and diarrhea, at least, and choking or death at worse.

2 ivory flameless LED Candles displayed on a table next to a couch. Ferns and a plant are decorated around the candles.

How Flameless Candles Can Save You Money

Home decorators love candles for their power to transform ambiance. Candles create a calming environment, especially after a stressful day at work. Beautiful candlelight is soothing to gaze upon and can make your home look gorgeous. But candles can be expensive due to their disposable nature. Not to mention the dangerous risks they pose to homes, children and pets.

The average 4-inch tall pillar candle has only about 45 hours of burn time. After that, the messy melted wax has to be thrown out and replaced. This is costly in the long run, as most candle users enjoy lighting their candles regularly. However, there is a more sustainable and cost-effective alternative.

Flameless candles have been around for over 2 decades and they’ve become more and more realistic as LED technology improved. L&L Candle is the pioneer behind LED candle innovation, with Matchless Candle Co. as their trendy, experiential brand. These faux candles are feature-packed and are still made with paraffin wax to look just like the real thing. Except, flameless candles can last years rather than weeks.

Moving Flame technology patented by L&L Candle, is the most premium, life-like feature of flameless available on the market. While Moving Flame candles are more expensive than traditional flame-burning candles, they are safer and save homeowners money in the long run. This is because replacing batteries (especially if you buy in bulk) is much cheaper than replacing candles.

While a traditional 3” x 4” pillar candle lasts 45 hours, a Matchless flameless pillar will last 150 or more hours. That means, by the time a traditional candle user has gone through 3 replacement candles, a flameless candle user is simply switching out the batteries.

If the average consumer is lighting their traditional candle for 5 hours a day, they could be saving $132* a year using Matchless candles. Despite the higher up-front cost of a flameless candle, the investment breaks even after only 2 months. Considering flameless candles can last years, candle lovers can save hundreds of dollars in the long run with these safer alternatives.

Check out Matchless Flameless Candles on Amazon at: https://amzn.to/2TudpCl

An infographic showing the cost savings with flameless LED Candles versus traditional candles over time.

* This study was conducted by L&L Candle using traditional wax pillar candles in a controlled environment. Candles were monitored for burn time and contrasted against flameless candle run times. The cost of batteries was reflected in the comparison and proved to be more cost-effective than replacing burning candles.